 |
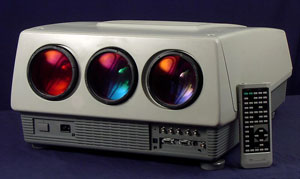 NEC PG Series NEC PG Series
Mechanical Setup Procedure
|
(Page 8)
|
Page: 1 2
3 4
5 6
7 8 |
RED & BLUE ALIGNMENT
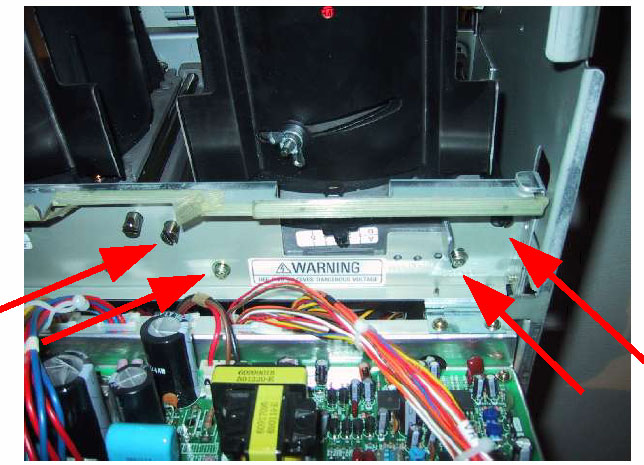
Now with the green crosshair up, turn on the red tube and see where things are.
Here is where an
important step comes in. To center the crosshair VERTICAL bar, you must move the
entire tube/lens assembly (toe-in adjustment). Loosen the 2 brass screws on top of the CRT
bracket that lock
the tube into one of several preset positions. Remove the “preset” screw and
move it to the curved
slot right next to it. Now loosen the 2 black screws for that tube as well. DO
NOT TOUCH THE
GREEN! You will have to carefully and gently wiggle the entire lens/crt assembly
right or left to
align the center portion of the VERTICAL bar on top of the GREEN. Look at the
center for this.
Once the vertical bar is aligned, tighten the screws again.
You then use the centering magnets to align the red HORIZONTAL bar to the green.
While doing
this, everything moves, but don't worry. The goal is to get the dead center to
line up. You are also
just trying to get the horizontal lines all aligned. You'll correct the vertical
lines during the
convergence setup. You may need to rotate the red deflection yoke to make it
level.
Now repeat the focus and astigmatism procedure for the red tube. Take your time.
Do not loosen
the CRT again.
Once the red is completed, repeat everything with the blue.
NOTE: When you close the deflection board cover and the projector cover, the red
static
convergence will move. This is normal, and caused by magnetic interference. To
fix this, you must
compensate for this shift by purposely aligning the red centering rings so that
everything moves
into place when the cover is closed. It is not hard at all. Try it, and you'll
see what you need to do.
Do NOT touch the astig magnets anymore!
Ok, once all 3 tubes are done and focused, don't forget to flip the BLUE DEFOCUS
switch back to
ON. This is done to improve white balance. The blue MUST be slightly out of
focus to be bright
enough for good grayscale.
At this point you need to reset your background color balance. Turn the
brightness to “50” and the
contrast to “75”. Store these values. Now hit KELVIN.
Important Note before continuing: Do not adjust the Kelvin (color
temperature) settings without writing
down the original values first in case you make things worse!
While looking into each
tube, adjust the “B”
or Background, or Black level, whatever you want to call
it until the raster for
that color JUST
vanishes. Do it slowly, go back and forth if needed. I actually set
my unit to
where I can just barely
make out the raster. It's personal Preference, as long as all 3 are
the same.
Store those settings. You
can now adjust the “W” or white sliders using a greyscale pattern or black and
white image to
achieve best grey to your liking. This is rough, but quite usable without a
color analyzer.
Store all settings.
So now you should have properly focused and centered images on your screen. With
the static
convergence set to ZERO, you should have perfect, or very near perfect
convergence in the
CENTER of your screen, all without making any electronic corrections!! It is now
just a matter of
dialing in all the edges using the menu controls.
The Mechanical part is done. Don't forget to store this entry as the default
while you are at it. The
next time you need to create a new entry, simply select default as your initial
data, and you have
your proper starting point again. NOW, if your crosshair does not fall into the
exact center of your
screen, adjust the projector itself up, down, left or right to center it. DO NOT
USE ANY MENU'S
FOR THIS!!! THAT'S how the alignments originally get screwed up. NOTE: once you
complete
this procedure you'll need to follow the install manual for completing the
electronic convergence
setup.
Also, please refer to other articles such as Guy Kuo's "holy focus" document for
more advanced
techniques, as well as the setup manual for an illustration of the astigmatism
procedure and details
on the convergence procedure.
| Did you find this information useful? Please consider making a
donation to help defray the cost of managing and hosting future
articles, tips, and documents. |
|
|
|
Or
purchase
from
Amazon.com
and a small percentage automatically
goes to support this site at no extra cost to you! Visit their
Blu-ray and
4K UHD
stores for sales.
Want to show off your
home theater? See our
Blu-ray Release List & Must-Have Titles. |
|

|
|
|
|

