37- Reassemble the tube hearting system :
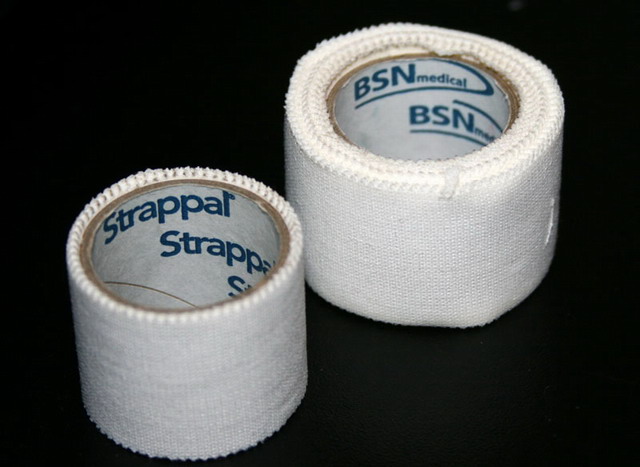
38- Now, you need to add adhesive tissue tape on the tube's necks. First buy
this special (medical) adhesive tissue tape :
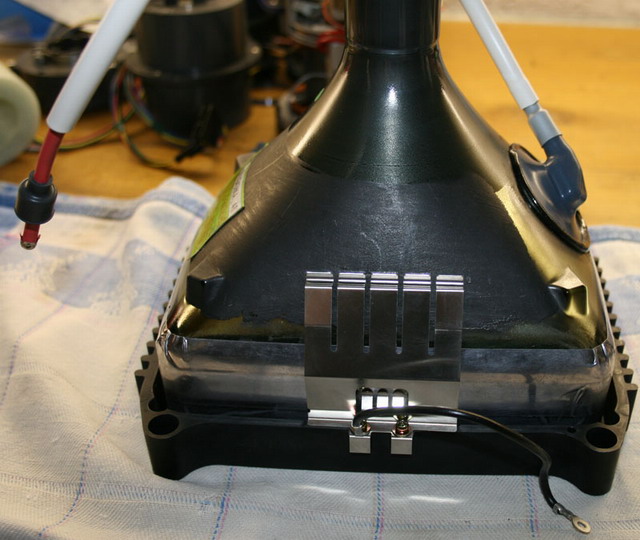
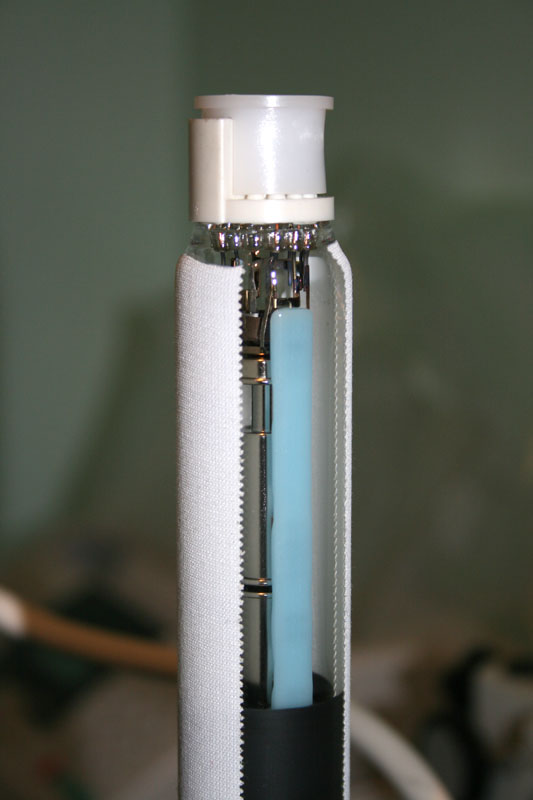
39- Place two stripes of this adhesive tissue tape on each tubes neck facing
each other :
40- Reassemble the tube/aluminium assembly to its relative LC/tank housing.
FIRST clean the new tube front face with acetone
then alcohol so there is no remaining dust/traces on the optical active area.
Once done, place the tube face on the LC tank as fast as possible to avoid any
dust input inside the glycol tank. Place back in place the four Philips screws
and screw them in cross axis order.
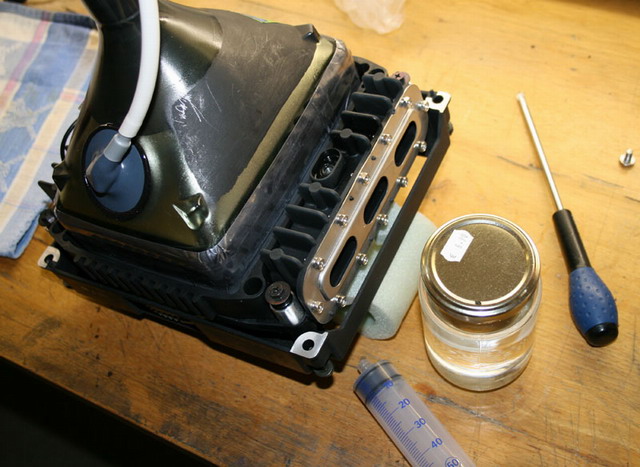
41- Using a syringe, Fill back in tank the 250ml stored glycol :
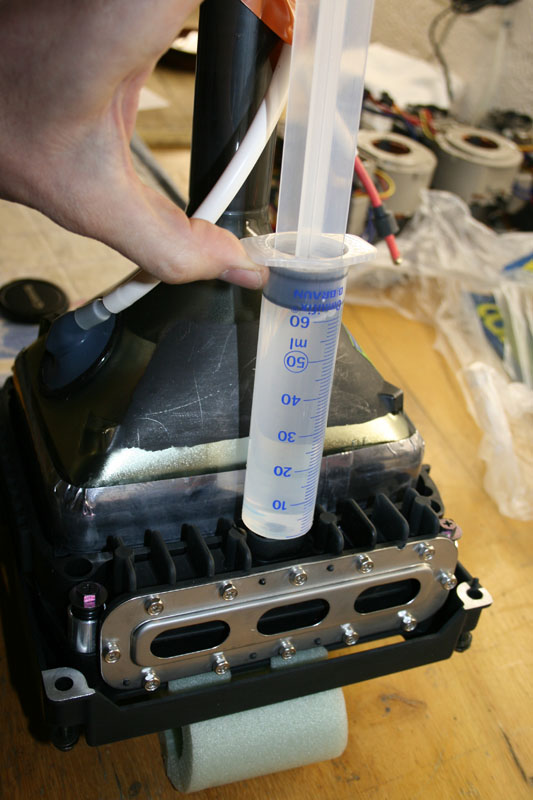
At each 50/60ml step, gently tilt the tube to let the air bubbles exit the
C-element chamber via the tank's hole (this allows you to continue to fill the
tank with glycol).
42- Now put back in place the colour relevant DY/Sub DY coils and press it
against the tube before 'lightly' screwing its circular neck screw. 'Light'
screwing is a must to be able to adjust the generated image rotation during
mechanical adjustments.
43- Don't forget to carefully put back in place the plastic wedge located
between Sub-DY and MG coils!
44- Put back in place the colour relevant MG focus coils and press it against
the DY coil wedge before screwing its circular neck screw.
45- Ending, put back in place the colour relevant 2P/4P coils and press it
against the MG focus coil before screwing its circular neck screw.
WARNING: Do not over tighten the neck screws against the tube
neck or glass may brake! refer to the Sony service manual (tightening torque
force is 80-120N.cm or 8.16 to 12.24kgF.cm).
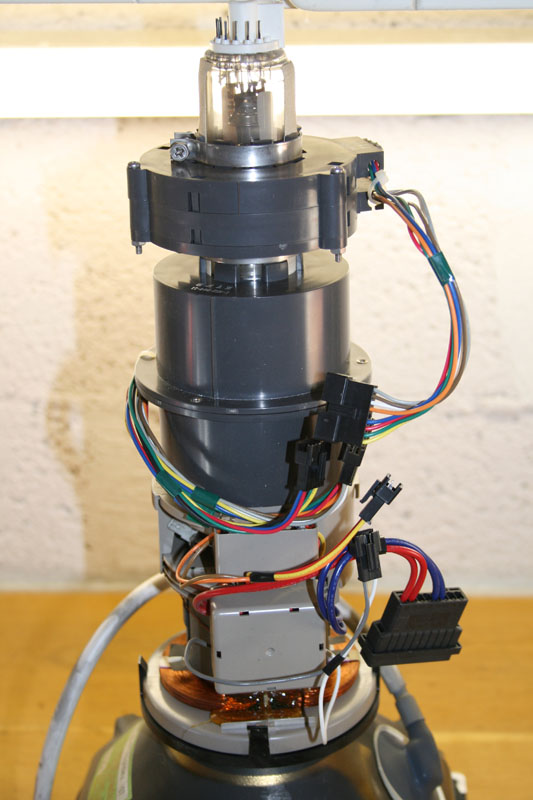
46- All these coils placements must be done in the same way they were located on
their original 'toasted' tube. You can take pictures of the original assembly to
remind their positions / orientation :
47- Then you can carefully slide in the complete assembly within the G90
unit, with one hand on the LC housing and the other on the tube neck end to
prevent damage. Check that every wire/connector is NOT stressed during this
operation (doing this operation with a friend can be useful). Ensure that the HV
lead comes in the right holder bracket. Then reconnect the C board to the tube
neck. Ensure that the pins are fully inserted within the C block tube's socket.
48- Reconnect all the relevant cols wires/connectors. Do not forget to re-attach
the DY hearting black wire and the HV lead end to the HV block (press down the
wire then rotate 90° and release : check if the wire is secured by pulling it.
If Ok, replace the grey silicon cap above the tube).
49- Screw back in place the tube LC housing to the relative brackets then put
back the lens and screw it on.
50- Fire-up the unit and start the necessary mechanical adjustments described in
the G90 service manual (after tube replacement). Don't forget to redo the D65
colorimetry even for one single tube replacement! (See our
Grayscale &
Color Calibration for Dummies guide).
!!! Important : do not mix-up the lens neither the coils
between tubes !!!! Always put a R/G or B coloured round stickers on the colour
relative parts to ensure that mixing could NOT occur !!
That's all.
Enjoy the new tube(s) on the G90 !
John
P.S. Please note that Terry helped me with some explanations on the
critical part of this job (carefull cutting of the silicon join between the old
tube face and the tube holder mechanic). So thanks to him : he's the best/smart
techy guy on Sony CRT projectors and you can always count on him!
| Did you find this information useful? Please consider making a
donation to help defray the cost of managing and hosting future
articles, tips, and documents. |
|
|
|
Or
purchase
from
Amazon.com
and a small percentage automatically
goes to support this site at no extra cost to you! Visit their
Blu-ray and
4K UHD
stores for sales.
Want to show off your
home theater? See our
Blu-ray Release List & Must-Have Titles. |
|

|
|

|

