| Author |
Message |
Audio_Geek_00

Joined: 07 Aug 2014
Posts: 82
Location: SF Bay Area
|
| Posted: Sat Feb 21, 2015 12:55 am Post subject: Pis of re-tubing my Sony 1252Q |
|
|
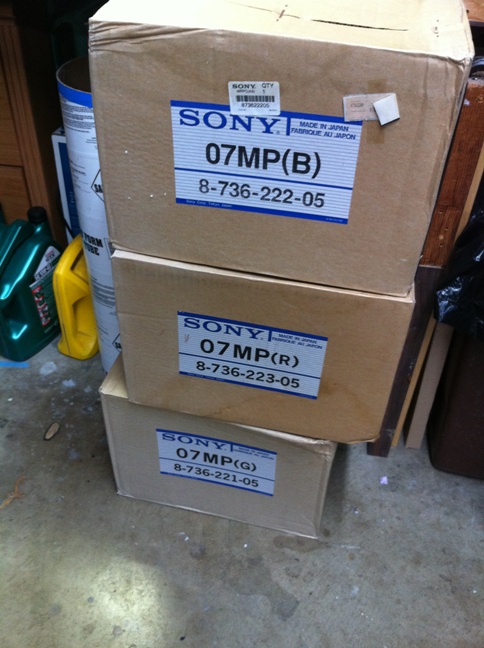
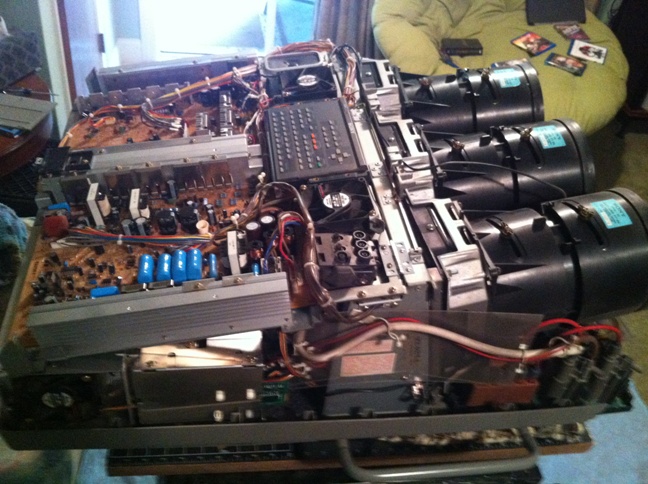
Thought I would share these. Even tough it seemed a bit daunting at first, putting in the new tubes turned out to be a fun project. If the PJ hadn't worked after what I had done then not so fun.
| Description: |
|
| Filesize: |
123.9 KB |
| Viewed: |
8548 Time(s) |
|
|
|
| Back to top |
|
 |
Audio_Geek_00
Joined: 07 Aug 2014
Posts: 82
Location: SF Bay Area
|
| Posted: Sat Feb 21, 2015 12:57 am Post subject: Re-tubing |
|
|
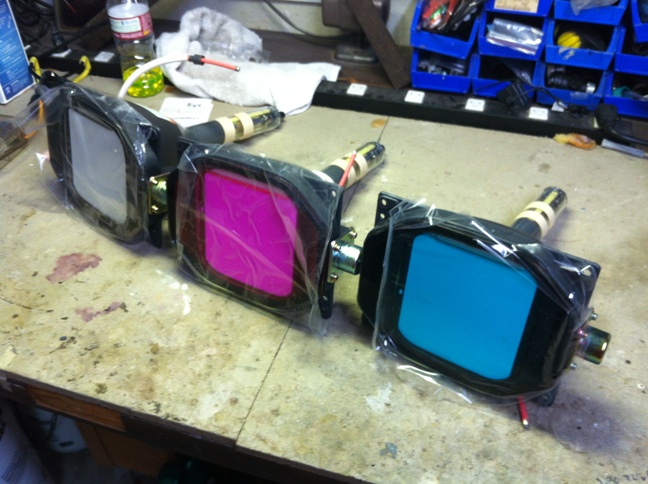
Nice and shiny!
| Description: |
|
| Filesize: |
129.6 KB |
| Viewed: |
8547 Time(s) |
|
|
|
| Back to top |
|
|
Audio_Geek_00
Joined: 07 Aug 2014
Posts: 82
Location: SF Bay Area
|
| Posted: Sat Feb 21, 2015 12:59 am Post subject: re-tube |
|
|
What a ball buster to get this down without adding more repair work. it was more of a controlled drop than anything.
| Description: |
|
| Filesize: |
109.93 KB |
| Viewed: |
8546 Time(s) |
|
|
|
| Back to top |
|
|
Audio_Geek_00
Joined: 07 Aug 2014
Posts: 82
Location: SF Bay Area
|
| Posted: Sat Feb 21, 2015 1:00 am Post subject: re-tube |
|
|
No wonder I've been sneezing.
| Description: |
|
| Filesize: |
142.16 KB |
| Viewed: |
8545 Time(s) |
|
|
|
| Back to top |
|
|
Audio_Geek_00
Joined: 07 Aug 2014
Posts: 82
Location: SF Bay Area
|
| Posted: Sat Feb 21, 2015 1:03 am Post subject: re-tube |
|
|
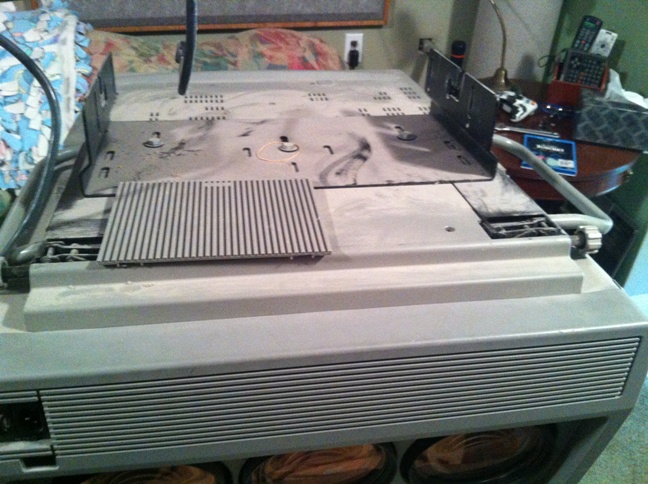
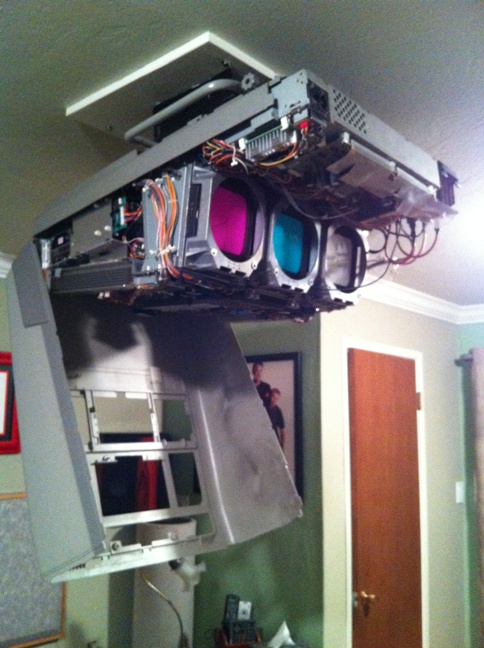
I have to admit when I took off the covers I got intimidated again. Fortunately the manual shows how to remove what to get out the tubes out. The chassis looks like a nightmare but it is made to be serviced with very few screws need removal (except the video boards and heat sinks).
| Description: |
|
| Filesize: |
150.37 KB |
| Viewed: |
8543 Time(s) |
|
|
|
| Back to top |
|
|
Audio_Geek_00
Joined: 07 Aug 2014
Posts: 82
Location: SF Bay Area
|
| Posted: Sat Feb 21, 2015 1:06 am Post subject: re-tube |
|
|
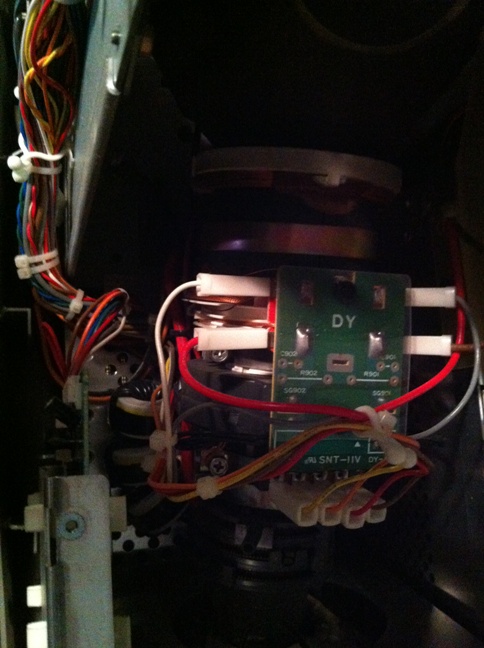
I took pictures of everything I would be taking apart so that I had a handy reference. Especially handy when dealing with cables and such. This is the green gun.
| Description: |
|
| Filesize: |
115.87 KB |
| Viewed: |
8540 Time(s) |
|
|
|
| Back to top |
|
|
Audio_Geek_00
Joined: 07 Aug 2014
Posts: 82
Location: SF Bay Area
|
| Posted: Sat Feb 21, 2015 1:08 am Post subject: re-tube |
|
|
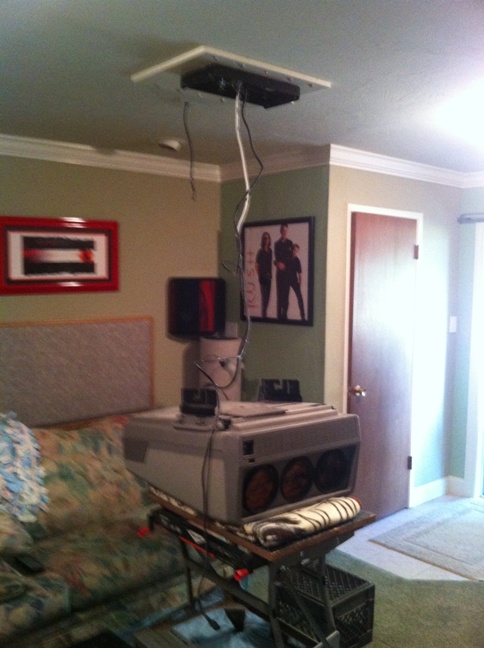
Lenses' out. I should have done this before I took the PJ off of the ceiling. It takes about 35lbs off.
| Description: |
|
| Filesize: |
121.47 KB |
| Viewed: |
8538 Time(s) |
|
|
|
| Back to top |
|
|
Audio_Geek_00
Joined: 07 Aug 2014
Posts: 82
Location: SF Bay Area
|
| Posted: Sat Feb 21, 2015 1:10 am Post subject: re-tube |
|
|
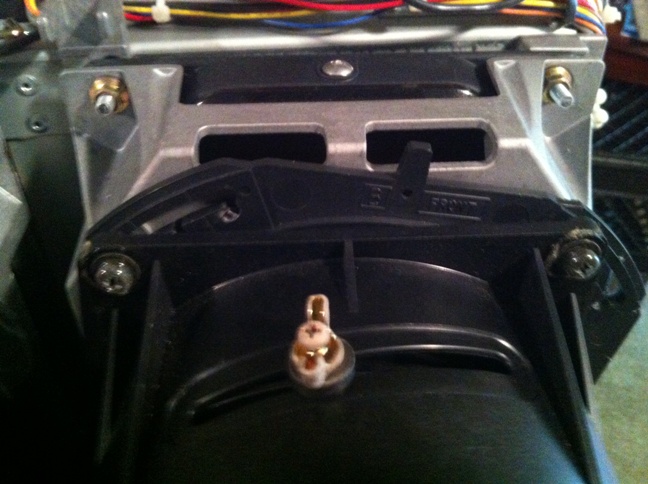
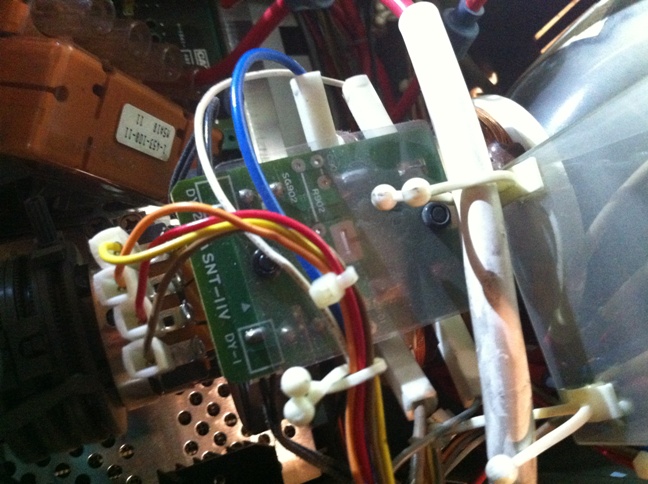
Getting my nerve up to disconnect the yoke harnesses from the tubes.
| Description: |
|
| Filesize: |
134.37 KB |
| Viewed: |
8528 Time(s) |
|
|
|
| Back to top |
|
|
Audio_Geek_00
Joined: 07 Aug 2014
Posts: 82
Location: SF Bay Area
|
| Posted: Sat Feb 21, 2015 1:11 am Post subject: re-tube |
|
|
Don't get the colors mixed up.
| Description: |
|
| Filesize: |
107.88 KB |
| Viewed: |
8527 Time(s) |
|
|
|
| Back to top |
|
|
Audio_Geek_00
Joined: 07 Aug 2014
Posts: 82
Location: SF Bay Area
|
| Posted: Sat Feb 21, 2015 1:13 am Post subject: re-tube |
|
|
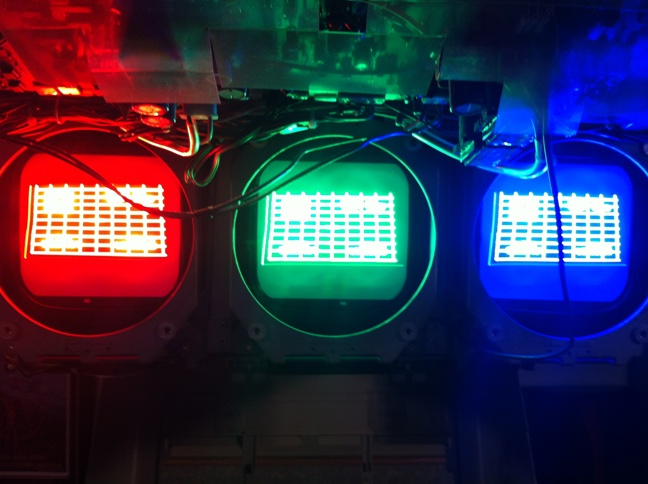
They follow the same logic on all three tubes.
| Description: |
|
| Filesize: |
133.59 KB |
| Viewed: |
8525 Time(s) |
|
|
|
| Back to top |
|
|
Audio_Geek_00
Joined: 07 Aug 2014
Posts: 82
Location: SF Bay Area
|
| Posted: Sat Feb 21, 2015 1:16 am Post subject: re-tube |
|
|
Tubes are out. I got really nervous at this point. I wasn't sure how badly I could screw this up but there looked like a lot of opportunity. I was worried I'd break something trying to remove the yoke assembly. The old tape didn't want to let go. But it is not quite as fragile as I thought and I was able to persuade them to come off.
| Description: |
|
| Filesize: |
113.81 KB |
| Viewed: |
8523 Time(s) |
|
|
|
| Back to top |
|
|
Audio_Geek_00
Joined: 07 Aug 2014
Posts: 82
Location: SF Bay Area
|
| Posted: Sat Feb 21, 2015 1:18 am Post subject: re-tube |
|
|
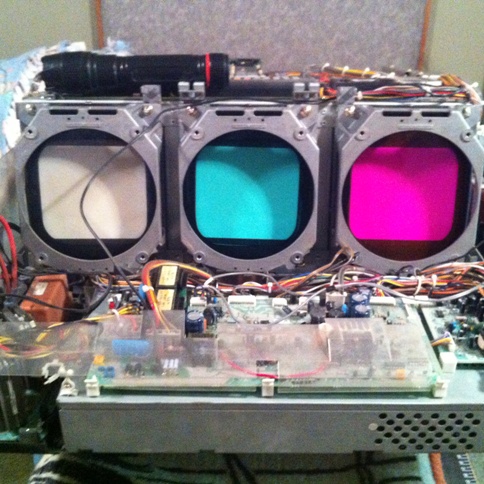
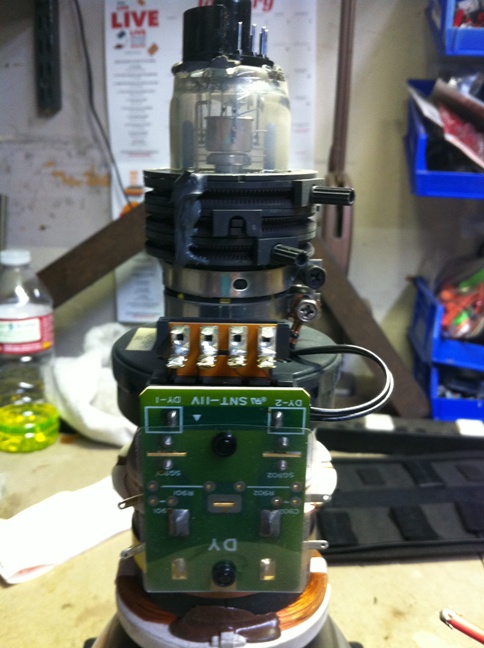
Yoke assemblies transferred to the new tubes.
| Description: |
|
| Filesize: |
140.42 KB |
| Viewed: |
8523 Time(s) |
|
|
|
| Back to top |
|
|
Audio_Geek_00
Joined: 07 Aug 2014
Posts: 82
Location: SF Bay Area
|
| Posted: Sat Feb 21, 2015 1:19 am Post subject: re-tube |
|
|
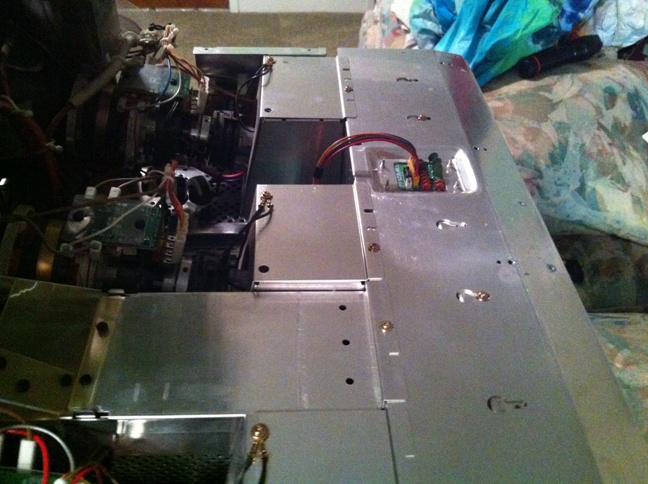
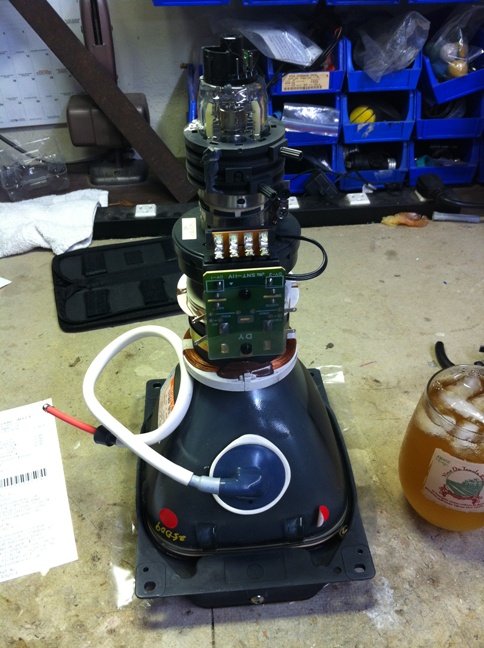
Tube assemblies re-installed.
| Description: |
|
| Filesize: |
161.28 KB |
| Viewed: |
8521 Time(s) |

|
|
|
| Back to top |
|
|
Audio_Geek_00
Joined: 07 Aug 2014
Posts: 82
Location: SF Bay Area
|
| Posted: Sat Feb 21, 2015 1:22 am Post subject: re-tube |
|
|
Back on the ceiling. Not having the lenses installed help tremendously, although it adds difficulty putting the lenses in.
| Description: |
|
| Filesize: |
130.44 KB |
| Viewed: |
8520 Time(s) |
|
|
|
| Back to top |
|
|
Audio_Geek_00
Joined: 07 Aug 2014
Posts: 82
Location: SF Bay Area
|
| Posted: Sat Feb 21, 2015 1:23 am Post subject: re-tube |
|
|
Raster adjustment.
| Description: |
|
| Filesize: |
107.99 KB |
| Viewed: |
8519 Time(s) |
|
|
|
| Back to top |
|
|
Audio_Geek_00
Joined: 07 Aug 2014
Posts: 82
Location: SF Bay Area
|
| Posted: Sat Feb 21, 2015 1:28 am Post subject: re-tube |
|
|
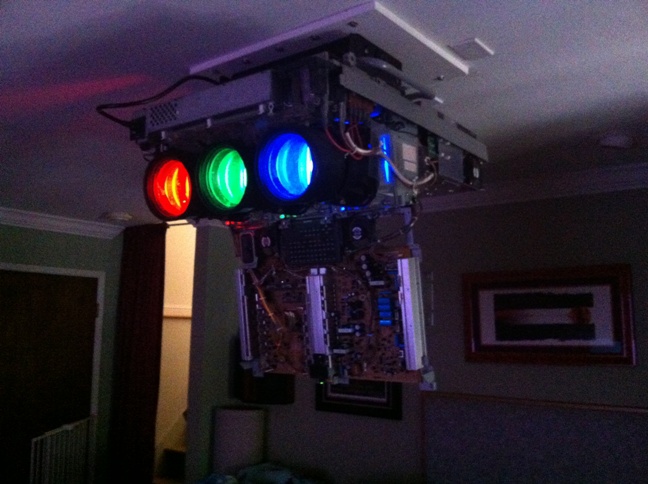
Lenses installed. Now the real fun begins. I used the CRT setup video to go through my PJ. I did OK but feel like it could be better. But overall I'm really happy with the added clarity and brightness. It perked the ole girl up a bit for not much money at all. Consider doing it if you can get a new set of tubes at a good price. It makes a worthwhile difference.
Best
Tim
| Description: |
|
| Filesize: |
113.26 KB |
| Viewed: |
8517 Time(s) |
|
|
|
| Back to top |
|
|
CasetheCorvetteman

Joined: 09 Nov 2008
Posts: 6326
Location: Australia
|
| Posted: Sat Feb 21, 2015 11:46 am Post subject: |
|
|
Well done mate, bet its much sharper now 
_________________
Barco Cine 9, ,Sony VPL570ES 4K SXRD, 135" OZ Theatre Majestic 16:9 screen, Denon X6700in preamp mode, 2x 7ch Tonewinner amps, 2x Tonewinner 15" subs, 2x 10" subs, 7.2.6...
RUNCO DTV991 LC ( NEC XG 852 LC ) 100" 4:3 screen, H/K AVR 7.1...
|
|
| Back to top |
|
|
Audio_Geek_00
Joined: 07 Aug 2014
Posts: 82
Location: SF Bay Area
|
| Posted: Mon Feb 23, 2015 6:28 pm Post subject: |
|
|
|
Yes, much sharper and a bit brighter.
|
|
| Back to top |
|
|
Jeremy112
Joined: 28 Sep 2006
Posts: 2649
Location: Fond du Lac, WI
|
| Posted: Mon Feb 23, 2015 6:58 pm Post subject: |
|
|
nice work 
the very first CRT projector I ever worked with and setup was a 1272, had I replaced the tubes as you did, I'm sure it would have looked a lot better. I only paid a $1 for it though so I couldn't complain, it was a really easy to learn projector and fun to use.
Enjoy your new tubes 
_________________
When I'm asking for a Model number, that doesn't mean I'm asking for a nude photo with your number on it 
|
|
| Back to top |
|
|
Audio_Geek_00
Joined: 07 Aug 2014
Posts: 82
Location: SF Bay Area
|
| Posted: Tue Feb 24, 2015 10:52 pm Post subject: Thanx |
|
|
1$? Good deal! Yah, as far as these projectors go they are pretty simple.
The only reason I would consider getting rid of this PJ is 4k. The tubes bought me a year or two until more content is available. Someone may get it for quite cheap at that point but until then it will get me through.
|
|
| Back to top |
|
|
|
|


