| Author |
Message |
secstate
Joined: 20 Mar 2006
Posts: 720
|
| Posted: Fri Feb 20, 2009 2:41 pm Post subject: Removing CRT from Barco 1209s/Runco 1100 |
|
|
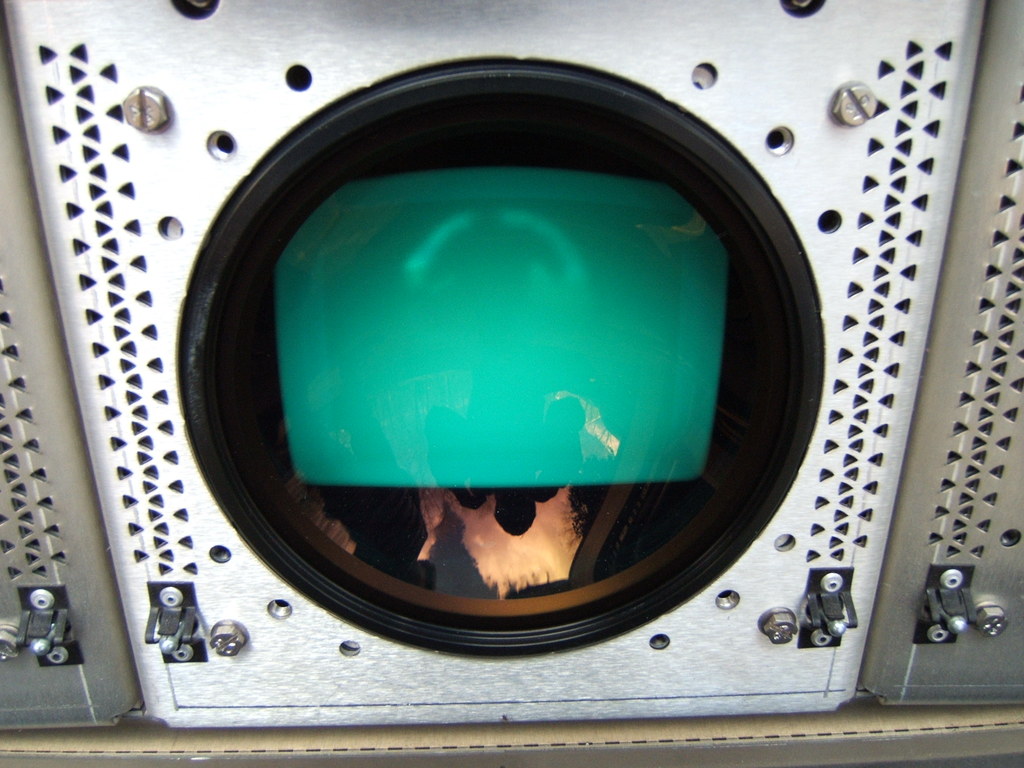
I have a simple question. How does one remove a tube from a Barco 1209s/Runco 1100 it looks like the four screws in the picture below are how you do it? Can anyone confirm? The service manual is strangely silient on this point. While the wear is not bad on my green it is too darn small to stay within and going outside it will drive me nuts with the color difference. So I am going to do what I swore off of when I removed 3 P16s from Ampro retro hardware and installed them in Barco hardware and I am going to do one more bare tube install (I am getting a new P19 from Greg). Thanks for the input.
Edit: spelling
| Description: |
|
| Filesize: |
180.78 KB |
| Viewed: |
4301 Time(s) |
|
Last edited by secstate on Fri Feb 20, 2009 9:47 pm; edited 1 time in total
|
|
| Back to top |
|
 |
Curt Palme
CRT Tech
Joined: 08 Mar 2006
Posts: 24396
Location: Langley, BC
TV/Projector: All of them!
|
| Posted: Fri Feb 20, 2009 3:05 pm Post subject: |
|
|
|
Undo the 4 bolts as you say, then the top will swing back, but the bottom will be held in with those two bottom pin/clip thingies. While the Barco manual tells you to manipulate the tube to unlock them, I find it easier to put a small flat blade screwdriver between the pin and the metal clip. That will unlock the one side, swing the pin out of the clip, then do the same on the other side.
|
|
| Back to top |
|
|
Gary M.
Guest
|
| Posted: Fri Feb 20, 2009 3:25 pm Post subject: |
|
|
easy as pie, even while ceiling mounted 
-Gary
|
|
| Back to top |
|
|
r.bauer
Joined: 08 Apr 2006
Posts: 280
Location: The Netherlands
|
| Posted: Fri Feb 20, 2009 4:02 pm Post subject: |
|
|
| Gary M. wrote: | | easy as pie, even while ceiling mounted |
The 1209s chassis shines again 
|
|
| Back to top |
|
|
Gary M.
Guest
|
| Posted: Fri Feb 20, 2009 4:05 pm Post subject: |
|
|
| r.bauer wrote: | | Gary M. wrote: | | easy as pie, even while ceiling mounted |
The 1209s chassis shines again |
I love it, coming from a XG it is a thing of beauty
-Gary
|
|
| Back to top |
|
|
r.bauer
Joined: 08 Apr 2006
Posts: 280
Location: The Netherlands
|
| Posted: Fri Feb 20, 2009 9:29 pm Post subject: |
|
|
|
I have developed a soft spot for this chassis. They are super reliable, very stable in operation, have very quiet fans, very easy to work on and an endless supply of parts available. Also the 9" LC Scheimpflug assembly is a beauty to look at, it is so cleverly designed and it has a high quality finish.
|
|
| Back to top |
|
|
secstate
Joined: 20 Mar 2006
Posts: 720
|
| Posted: Fri Feb 20, 2009 9:47 pm Post subject: |
|
|
| r.bauer wrote: | | I have developed a soft spot for this chassis. They are super reliable, very stable in operation, have very quiet fans, very easy to work on and an endless supply of parts available. Also the 9" LC Scheimpflug is a beauty to look at, it is so cleverly designed and it has a high quality finish. |
I have to agree I had a 1208s/2 that had some issues (known design flaw in early versions with horizontal width) and so I swapped in a 808s and I was surprised by how noisy it was in comparision. When I got my "Runcos" I honestly wasn't sure I would keep them but they were such a marvel and the picture was sooo nice even with my very quick and ditry setup that I decided I had to keep then. I cannot wait to get my new green and get one set up right.
|
|
| Back to top |
|
|
Tom.W

Joined: 09 Mar 2006
Posts: 6635
|
| Posted: Fri Feb 20, 2009 9:57 pm Post subject: |
|
|
| r.bauer wrote: | | I have developed a soft spot for this chassis. They are super reliable, very stable in operation, have very quiet fans, very easy to work on and an endless supply of parts available. Also the 9" LC Scheimpflug assembly is a beauty to look at, it is so cleverly designed and it has a high quality finish. |
I would agree... Very nice overall layout and lots of room in the CRT compartment. Most of the boards in the 1208s will also work in the 1209s. Would love to have a Cine 9 but the 1209s is the next best thing and as you say lots of parts out there ! 
|
|
| Back to top |
|
|
secstate
Joined: 20 Mar 2006
Posts: 720
|
| Posted: Sat Feb 21, 2009 6:03 pm Post subject: |
|
|
|
Thanks for the tips guys. Wow that was easy, I think that is the easiest tube removal I have ever done....
|
|
| Back to top |
|
|
|
|


