|
As this forum is rarely used anymore, we've locked it. Feel free to browse and read. Questions? Please reach out to us directly. Cheers! |
|
|
 |
|
|
| Author |
Message |
tri_joel

Joined: 03 Jul 2007
Posts: 646
Location: Northern Virginia
|
| Posted: Fri Mar 18, 2011 2:59 pm Post subject: |
|
|
| jcmccorm wrote: | Wow, this is really impressive. I am intriqued by the idea of DIY speakers. I guess being a CRT guy for the last 10 years means that I am a DIY-guy at heart, but I've never really thought of building a speaker.
Can you explain the finishing process when you get there? I love working with wood but have never done anything but paint it, or stain/sand/poly. I have no idea how to get a *real* finish on something like a speaker (or guitar, which I imagine would be similar).
Also, where's a good place to start to learn about the design process? I know that when (not if) I give a DIY speaker a shot, I'd be going with a design that's been proven before, but it would be nice to know the design process to be able to evaluate the strengths and trade-offs associated with different designs. ANy books or online material to start out with? Thanks, and keep those pictures coming!
Cary |
zaph audio http://www.zaphaudio.com/ to learn, Madisound to buy http://www.madisound.com/store/index.php?manufacturers_id=186&gclid=CJfNnJG666MCFUWC5QodlHrl1w
Parts Express for both: http://www.parts-express.com/resources/build-a-speaker.cfm
_________________
www.vawinesnob.com
|
|
| Back to top |
|
 |
ecrabb
Forum Moderator

Joined: 13 Mar 2006
Posts: 15909
Location: Utah
TV/Projector: JVC RS40, Epson 5010
|
| Posted: Fri Mar 18, 2011 3:50 pm Post subject: |
|
|
| jcmccorm wrote: | | Wow, this is really impressive. I am intriqued by the idea of DIY speakers. I guess being a CRT guy for the last 10 years means that I am a DIY-guy at heart, but I've never really thought of building a speaker. |
Thanks for the comment, Cary! But, if you look at what a lot of DIY speaker builders are doing every day, my project really ain't that impressive... From six-foot tall line-array speakers with walnut and maple laminate finished in a mirror gloss to subs built and organically shaped and sculpted from dozens of layers of plywood, people are doing some really, really amazing things DIY - and spending (in some cases) hundreds of hours doing it. Compared to many of those projects, my little sub project ain't much to write home about: Simple box with rounded edges, bracing, textured and painted black, stuffed, driver and plate amp installed Not much more to it. Sealed subs are probably the easiest type of speaker to build right and the most difficult to screw up very badly.
| jcmccorm wrote: | | Can you explain the finishing process when you get there? I love working with wood but have never done anything but paint it, or stain/sand/poly. I have no idea how to get a *real* finish on something like a speaker (or guitar, which I imagine would be similar). |
Yeah, I'm totally cheating. My main speakers are all finished in a pebble-finish black vinyl, so I'm going to mimic that. I'm going to prime, spray with a textured paint, then shoot a satin black over the top. Not much to it.
If you want to learn how to finish the cabinets, there are lots of woodworking classes or workshops at community centers, community colleges, and even Woodsmith Stores if you live an are that has one. You could probably even build some speaker cabinets as part of the class. I haven't done it, but I've heard applying laminate is actually pretty easy. So, you build an MDF box, then you wrap with laminate and iron it one (heat-activated adhesive), then sand and stain/finish like any other wood.
| jcmccorm wrote: | | Also, where's a good place to start to learn about the design process? I know that when (not if) I give a DIY speaker a shot, I'd be going with a design that's been proven before, but it would be nice to know the design process to be able to evaluate the strengths and trade-offs associated with different designs. ANy books or online material to start out with? Thanks, and keep those pictures coming! |
Joel hit the main links already, but you can also read the Loudspeaker Design Cookbook to learn a lot of the basics. It's not a difficult read, and it'll give you a decent fundamental understanding of drivers, enclosures and crossovers and they work together.
There's also lots of fun (and totally mind-blowing) projects going on in the AVS DIY Speakers and Subs forum.
SC
|
|
| Back to top |
|
|
AnalogRocks
Forum Moderator

Joined: 08 Mar 2006
Posts: 26706
Location: Toronto, Ontario, Canada
TV/Projector: Sony 1252Q, AMPRO 4000G
|
|
| Back to top |
|
|
ecrabb
Forum Moderator
Joined: 13 Mar 2006
Posts: 15909
Location: Utah
TV/Projector: JVC RS40, Epson 5010
|
| Posted: Fri Mar 18, 2011 4:48 pm Post subject: |
|
|
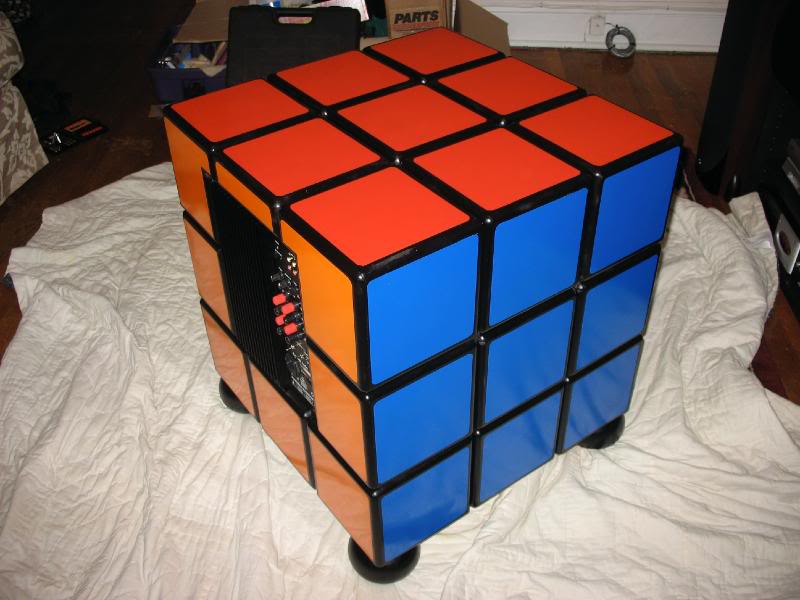
Yeah, that one's friggin' awesome if you have the right space for it. Another guy used the same design and did one with a different color scheme that was also pretty kick-ass.
SC
|
|
| Back to top |
|
|
ecrabb
Forum Moderator
Joined: 13 Mar 2006
Posts: 15909
Location: Utah
TV/Projector: JVC RS40, Epson 5010
|
| Posted: Fri Mar 18, 2011 4:52 pm Post subject: |
|
|
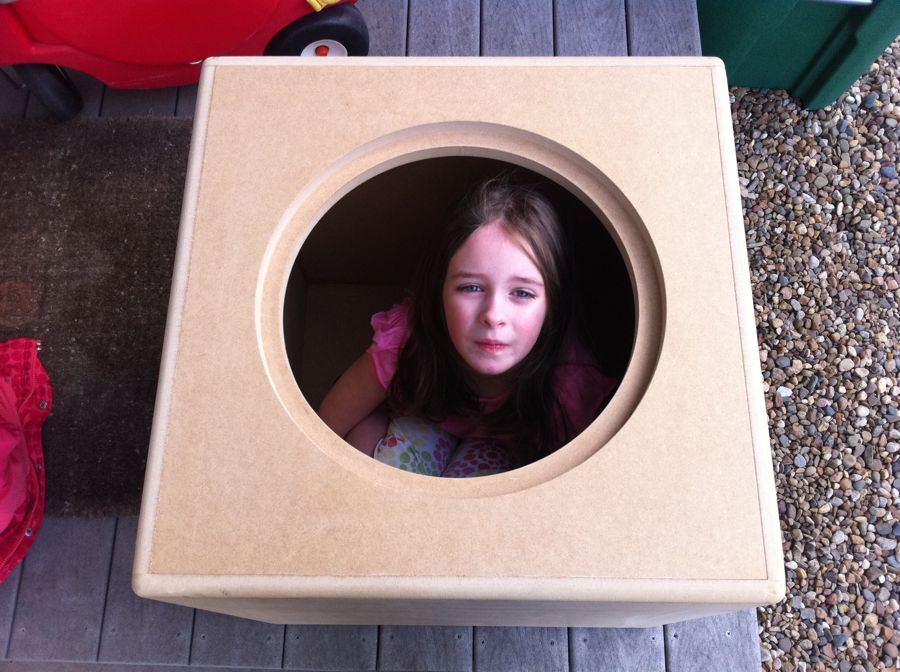
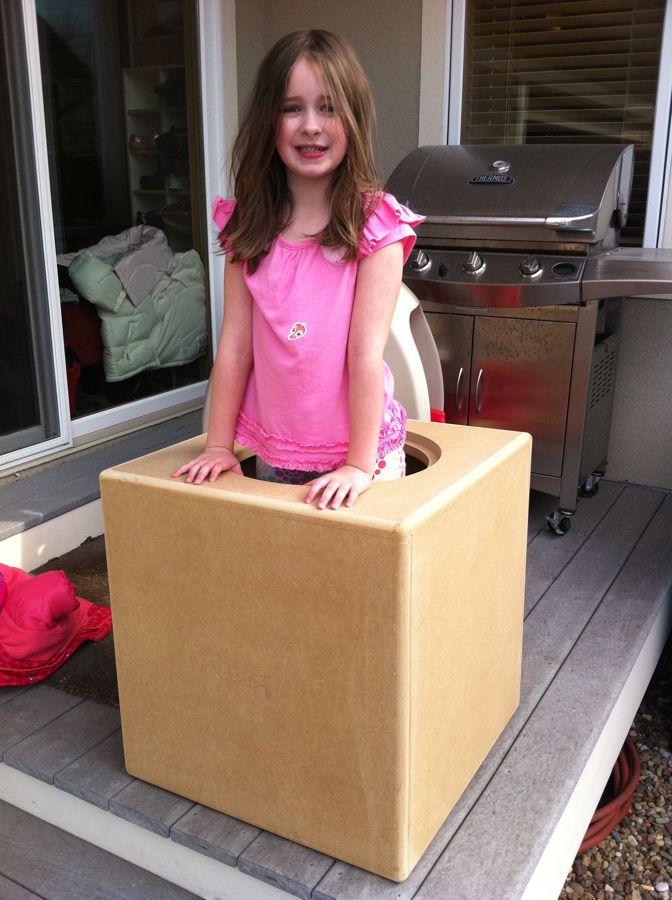
Oh and in case anybody is wondering how big these really are, my daughter Kaylee is a little over 48" (122cm) tall.


SC
|
|
| Back to top |
|
|
ecrabb
Forum Moderator
Joined: 13 Mar 2006
Posts: 15909
Location: Utah
TV/Projector: JVC RS40, Epson 5010
|
| Posted: Fri Mar 18, 2011 4:57 pm Post subject: |
|
|
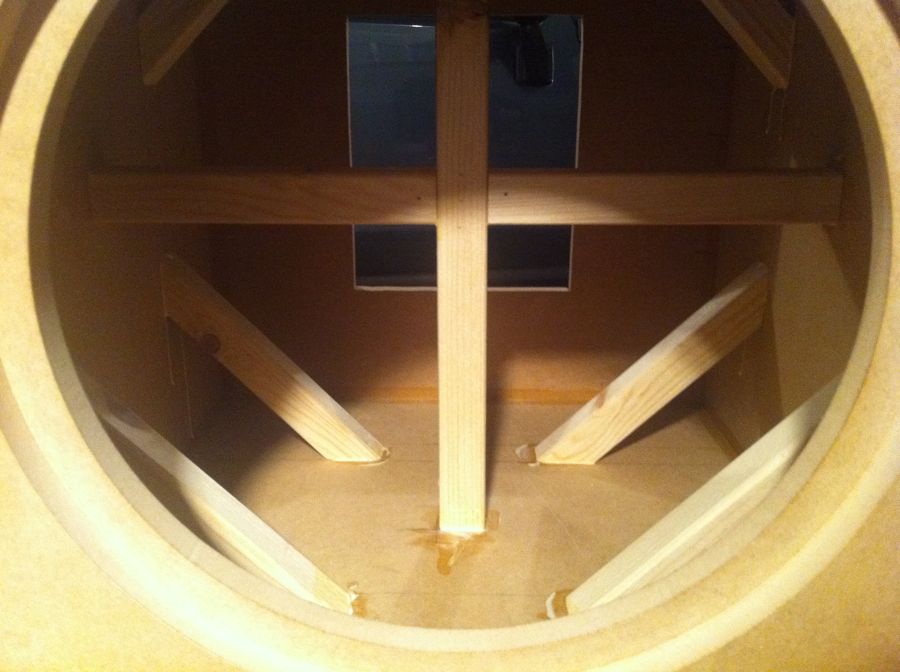
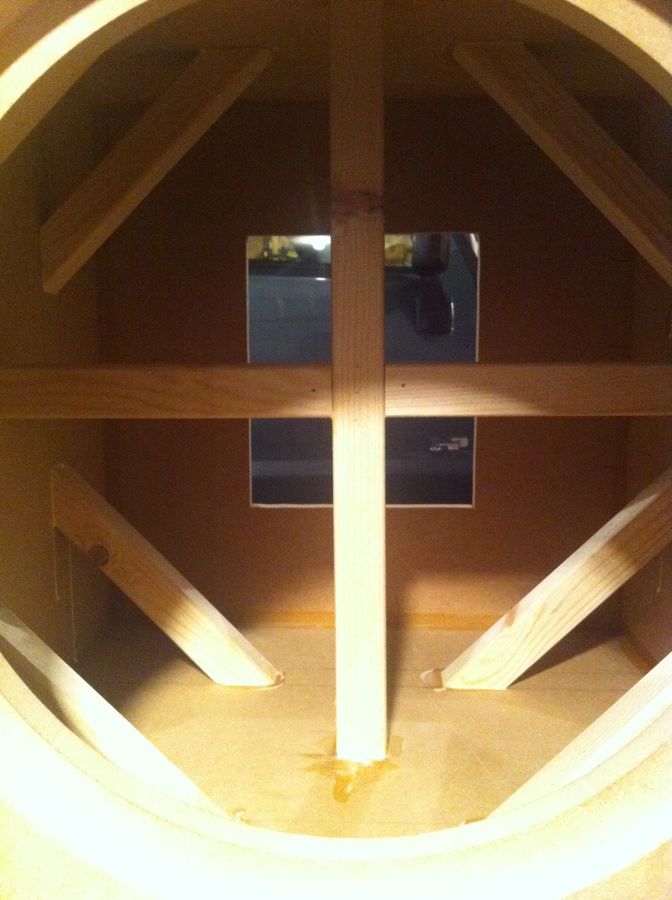
Oh, and I got the bracing finished last night!!!
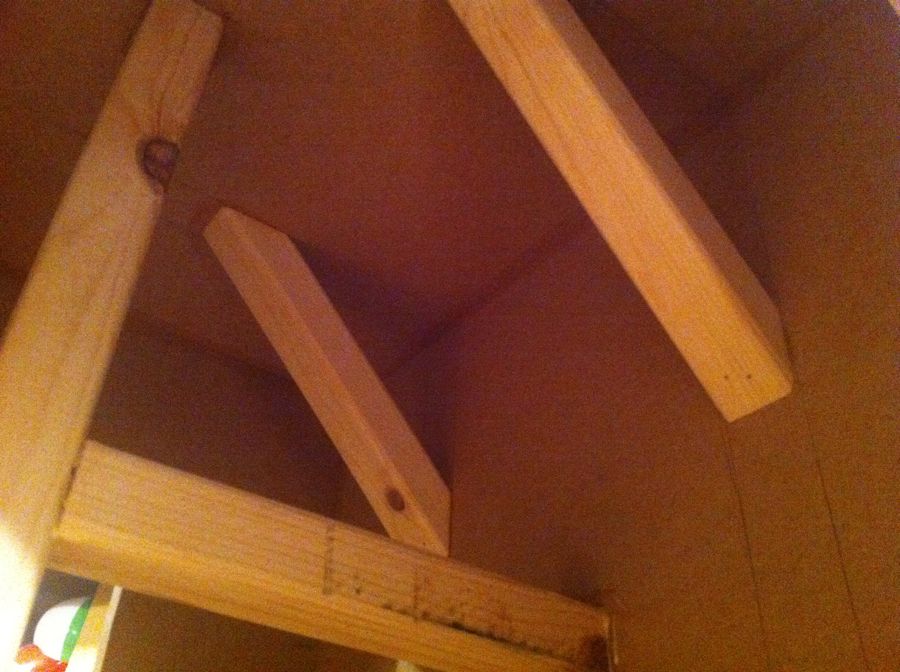
So, I still have to drill the holes for the grille mounts, I have to do a little more filling and sanding, and I'll be ready to prime and paint!
Thinking about some kind of simple 2x4 frame I can whack together in five minutes to screw onto the saw horse to hold the subs while I paint them... Thinking about one long 2x4, with two small "uprights" (like a football goal-post), but with two posts on the bottom instead of one... Something like that, anyway.
SC
|
|
| Back to top |
|
|
tri_joel
Joined: 03 Jul 2007
Posts: 646
Location: Northern Virginia
|
| Posted: Fri Mar 18, 2011 5:11 pm Post subject: |
|
|
Looking good Steve.
Are those braces screwed in addition to the glue and finish nails?
For painting, I drive 3" screws 1" deep into the top of my saw horses and then set what ever I'm painting on the screw heads. If you're spraying then it's pretty easy to get full coverage on the bottom without moving them. Just touch-up the small point where the screw heads contact the cabinet.
_________________
www.vawinesnob.com
|
|
| Back to top |
|
|
ecrabb
Forum Moderator
Joined: 13 Mar 2006
Posts: 15909
Location: Utah
TV/Projector: JVC RS40, Epson 5010
|
| Posted: Fri Mar 18, 2011 5:25 pm Post subject: |
|
|
No, no screws anywhere in the cabinets, Joel... Think I'll regret that? I tested a scrap piece that was nailed and glued and it seemed strong as hell. Each of the braces is glued (very liberally - you can see all the glue), and I shot two 1" brads through each (so about half an inch of brad in both brace and cabinet MDF. Each of the angled braces have a glued contact patch that's about 1.5 x 2.125 or over 3 sq inches of glued surface on each end. I'm not exaggerating when I say I think I could hang the entire cabinet by one of those braces. It sure feels solid!!!
Good idea on the screws in the saw horses... Duh! I'm even putting feet on them, so if I locate and mark the feet locations and put the screws in the same places on the saw horses, I shouldn't even have anything to touch up! Total duh! Might have to pick up a fourth saw horse so I can do two at a time, though. I've always wanted another one. Off to Menard's after lunch... 
SC
|
|
| Back to top |
|
|
tri_joel
Joined: 03 Jul 2007
Posts: 646
Location: Northern Virginia
|
| Posted: Fri Mar 18, 2011 5:42 pm Post subject: |
|
|
Standard wood glue does not bond to the paper face of MDF or end grain of SPF. I would run a screw in each one if it were mine. Since you are not done filling and sanding, just run a screw from the outside, counterbore for the screw head, and fill it with bondo. I over engineer everything though, my concern would be the constant vibration eventually breaking a glue joint loose.
If you're going to locate the painting screws where the foot screws will be - just drive your painting screws into the cabinet where the feet will go and put the whole enchilada on the saw horses.
_________________
www.vawinesnob.com
|
|
| Back to top |
|
|
dturco

Joined: 06 Feb 2009
Posts: 3778
Location: Eastern Shore Maryland
TV/Projector: Runco DLP VX-3000i Marquee 9500 parts doner
|
| Posted: Fri Mar 18, 2011 7:34 pm Post subject: |
|
|
If you going to spray them make a pinata. Get a 2x4 slightly larger then the speaker opening place it into the speaker opening turn it then use a chain to hang it from the rafters if you can, or around the garage door tracks near the end where the struts bolt to the ceiling. If your spraying. If using a roller or brush the screw idea is the way to go.
OK even if spraying, the screws are a really good idea too.
_________________
Firefly rules. Can't stop the signal.
http://www.hulu.com/firefly
|
|
| Back to top |
|
|
jcmccorm
Joined: 15 Jan 2008
Posts: 21
|
| Posted: Sat Mar 19, 2011 1:43 pm Post subject: |
|
|
Thanks for all the info guys! Plenty to keep me busy!
ecrabb, after poking around a bit and seeing some of the more "esoteric" DIY speaker projects, I see what your saying about your own project, but you're still being modest and selling yourself short. You're building your own speaker man! That takes skill, and cajones.
Cary
|
|
| Back to top |
|
|
-Pjackso
Joined: 31 Mar 2006
Posts: 791
Location: Oklahoma
|
| Posted: Sat Mar 19, 2011 3:45 pm Post subject: |
|
|
Did you use a speaker building software to design the box? (box size based on T/S values)
If so, which one?
_________________
-Nothing relevant to add.
|
|
| Back to top |
|
|
greg_mitch
Joined: 03 May 2006
Posts: 5320
|
| Posted: Sat Mar 19, 2011 5:37 pm Post subject: |
|
|
| -Pjackso wrote: | Did you use a speaker building software to design the box? (box size based on T/S values)
If so, which one? |
Cant speak for SC...but WinISD is probably the most widely used and easiest...from what I have seen.
|
|
| Back to top |
|
|
ecrabb
Forum Moderator
Joined: 13 Mar 2006
Posts: 15909
Location: Utah
TV/Projector: JVC RS40, Epson 5010
|
| Posted: Sat Mar 19, 2011 5:51 pm Post subject: |
|
|
| tri_joel wrote: | | Standard wood glue does not bond to the paper face of MDF or end grain of SPF. I would run a screw in each one if it were mine. Since you are not done filling and sanding, just run a screw from the outside, counterbore for the screw head, and fill it with bondo. I over engineer everything though, my concern would be the constant vibration eventually breaking a glue joint loose. |
Joel... I'm typically a big fan of over-building too, but on this project I'm trying to manage my over-building OCD tendency in favor of "gitten' 'er done!" To that end, I did just a bit of research and from that felt that clamping, gluing, and shooting brads would be more than adequate. Your comments got me a little worried, so I did a little more reading this morning...
From everything I'm reading, including a fair number of posts from speaker builders, if a guy uses a liberal amount of PVA-type adhesive with a high percentage of solids (like the Titebond II I'm using), and shoots brads into the joints, the material itself will probably fail before the joints themselves.
Oh, and on the whole "paper face" on the MDF thing... I'm not aware of any paper. The only thing I can detect is a sort of polished sheen, which from my reading, won't affect the performance of the joint. The PVA still supposedly soaks into the MDF. From wiping a wet cloth on the surface (doing glue clean-up), absorption doesn't seem to be a problem.
The joints all feel very solid and strong, so I'm moving ahead without screws and we'll see how things turn out... If the vibration from the sub breaks those joints, I'm going to have bigger things to worry about, I think!
SC
|
|
| Back to top |
|
|
ecrabb
Forum Moderator
Joined: 13 Mar 2006
Posts: 15909
Location: Utah
TV/Projector: JVC RS40, Epson 5010
|
| Posted: Sat Mar 19, 2011 6:05 pm Post subject: |
|
|
| greg_mitch wrote: | | -Pjackso wrote: | Did you use a speaker building software to design the box? (box size based on T/S values)
If so, which one? |
Cant speak for SC...but WinISD is probably the most widely used and easiest...from what I have seen. |
Yep, WinISD. Also tried a couple of others just to verify measurements, and one tool even let me add a high-pass filter with variable Q to model a LF boost, so that was interesting.
Oh, and I was wrong earlier... The -3dB point is 30hz, and the sub is down -6dB by 23hz. I'm hoping that between the parametric EQ and HPF in the O-Audio amps, the room, and running two subs, that I can get close to flat to well below 20hz. The old subs were probably close, but just not with much output. 1000w worth of amp and two 15" drivers in large cabinets should fix that.
Again, we'll see...
SC
|
|
| Back to top |
|
|
-Pjackso
Joined: 31 Mar 2006
Posts: 791
Location: Oklahoma
|
| Posted: Sun Mar 20, 2011 2:14 am Post subject: |
|
|
Edit: Post removed. Edit-Edit: Post re-posted.
SC,
You might have an issue with Cone Excursion...
If I entered the info correctly into WinISD:
Inputs:
1) Dayton Audio RSS390HF-4 Driver T/S info:
http://www.daytonaudio.com/lspeakers/reference_rss390hf-4.html
...Or you can download a WinISD file for your driver here:
http://www.hometheatershack.com/forums/diy-subwoofers-general-discussion/14410-downloadable-winisd-pro-files.html
2) Box info: 1 Driver per box, sealed configuration (closed, not ported):
Your box internal dimension is 20.33" cube, for a total internal volume of 8402 cubic inches (in^3).
Your bracing is 2x2 lumber, so (actual) is 1.5" x 1.5" x length. The length is (2) runs at 20.33", and then (8) diagonal braces at 8"? I estimated total bracing volume at 235 in^3.
Therefore total actual box volume (after bracing) is 8167 in^3.
3) You're using a 500W amp (each driver).
---------
WinISD shows frequency response: -3dB point is 30hz, and down -6dB by 23hz. (just like you said)
Using 500W, SPL has a high of 114db, 111db @ 30 hz, and drops below 105db @ 20hz.
!!!! You might have a problem with cone excursion.
Using 500W, the cone excursion exceeds Xmax at 36hz (and below) - you may have severe driver clipping (and possible damage).
I didn't use any "EQ or Filter" functions.
...Again, I'm not sure I input everything you did - but you might want to verify your software.
_________________
-Nothing relevant to add.
Last edited by -Pjackso on Sun Mar 20, 2011 5:31 pm; edited 2 times in total
|
|
| Back to top |
|
|
-Pjackso
Joined: 31 Mar 2006
Posts: 791
Location: Oklahoma
|
| Posted: Sun Mar 20, 2011 2:59 am Post subject: |
|
|
Edit: Post removed. Edit-Edit: Post re-posted.
Note: I am not an expert at speaker building
I've been playing with the WinISD model a little more:
If you reduce the actual box volume down to 4000 in^3 (after bracing): the smaller box significantly limits cone excursion.
Even at 500W, the cone excursion stays within factory limits over the entire frequency range (even down to 10 hz).
The smaller box volume does not effect SPL (stays same) and the -3db point moves up to 35 hz.
You may have a +1db gain at 66 hz.
...Again, that's providing my WinISD model is correct. Your model may be more refined, or have other features included.
My only point is to raise the concern.
So far, it's looking good!
_________________
-Nothing relevant to add.
|
|
| Back to top |
|
|
ecrabb
Forum Moderator
Joined: 13 Mar 2006
Posts: 15909
Location: Utah
TV/Projector: JVC RS40, Epson 5010
|
| Posted: Mon Mar 21, 2011 4:38 am Post subject: |
|
|
OK, finally getting around to responding to Paul's posts... Spent damn near all day in the garage finishing the damn boxes. I'm hoping to start installing feet, drivers, amp, etc. a couple of evenings this week.
Paul, I'm a total amateur too, sir!!! If you have questions or concerns, feel free to express them!
You're absolutely correct... The box is oversized... So much so that the driver will start to exceed Xmax in the 35hz ballpark if driven at anywhere near full-power. Here's the thing, though... My design goal wasn't output, but flattest frequency response I could get with most the extension I could get without spending a fortune. In fact, I designed the enclosure originally with the 300w amp in mind, but decided to buy the 500w amp because the price difference was relatively small. Read on for more about how I arrived where I did...
My system is clean to about 102dB, but I never listen at that volume. I typically watch more in the 90dB plus or minus ballpark. Now, "film reference" is supposed to be 105dB for the main/surround and 115dB for LFE, right? IMHO, that's way too loud in a small room the way most movies are mixed. So, if I typically listen at around 90dB, and the LFE is supposed to be +10dB, then the sub needs to be able to run about 100dB or so.
Now, back to the sub design... You might have noticed if you just let WinISD pick a box volume for maximum flat response, it comes up with a box in the 5.7 cuft ballpark. Obviously, you're sacrificing power-handling for flattest frequency response with that cabinet. By the same token, your ~2.3 cuft box would indeed prevent the driver from exceeding Xmax and give you more output in the upper frequency range, but as you pointed out, at the cost of about 3dB of extension down in the 20-30hz ballpark... In fact, the -3dB point moved up to 35hz from 30.
Based on my guidance, Darren (that was helping me design the sub) and I chose a compromise between maximum output/power handling (2.5cuft) and maximum extension/flattest FR (5.7cuft) at around 4.8 cuft after bracing, stuffing, amp, etc.
So, with a little bump from the parametric EQ on the O-Audio amp around 20hz, with the 12hz boost/LPF, and judicious use of the gain control, I think I can get flat in-room response down to around 18-20hz at around 101-102dB - something that wouldn't be possible with the smaller enclosure.
I'm getting long-winded... To wrap up, these were the main reasons I went with the larger enclosure...
1) I don't need to use all of the amp... I can calibrate the subs with the rest of the system so they're not hitting Xmax even when I have the system cranked. Headroom is good, even if I'm not using it all.
2) I wanted a larger cabinet to be able to accommodate a larger, higher-performance, higher-displacement driver later if I wanted.
3) The Xmax-limiting output is the main reason I'm building two subs instead of just one. Gives me another 6dB of output.. So, if one sub is good for 101dB at 20hz, then the two should be good for 107dB.
4) I can always use some pieces of filler MDF and/or pine to make the enclosure volume a little smaller... Doing the opposite is significantly more difficult.
So, that's pretty much it, I think. Discuss.
SC
|
|
| Back to top |
|
|
greg_mitch
Joined: 03 May 2006
Posts: 5320
|
| Posted: Mon Mar 21, 2011 5:05 am Post subject: |
|
|
|
Seems logical to me...do you have in room measuring capabilities once they get finished?
|
|
| Back to top |
|
|
ecrabb
Forum Moderator
Joined: 13 Mar 2006
Posts: 15909
Location: Utah
TV/Projector: JVC RS40, Epson 5010
|
| Posted: Mon Mar 21, 2011 5:09 am Post subject: |
|
|
A few new pics...
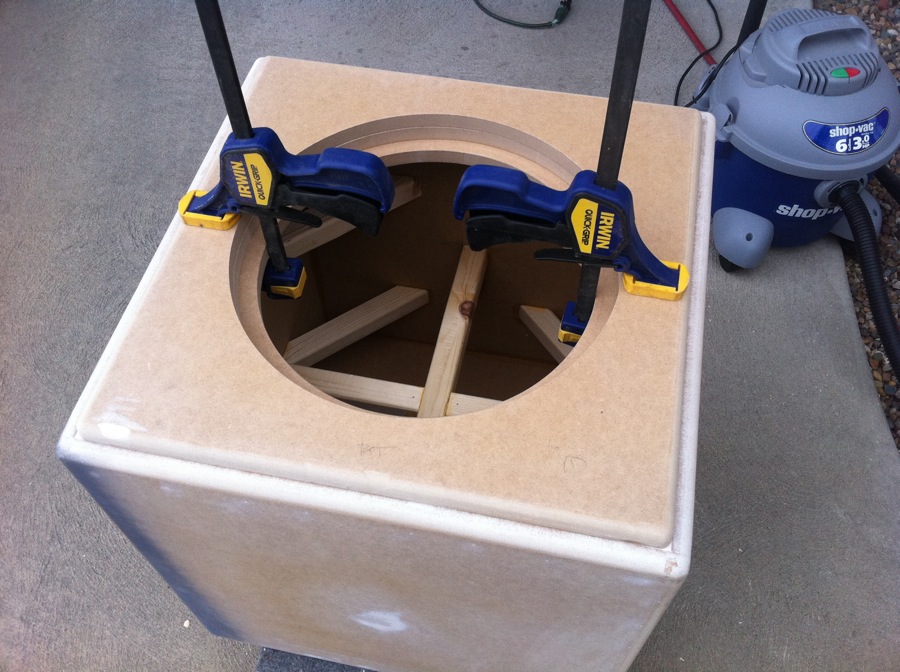
Clamping the grille on the front baffle to drill for the grile clips
Front baffle drilled
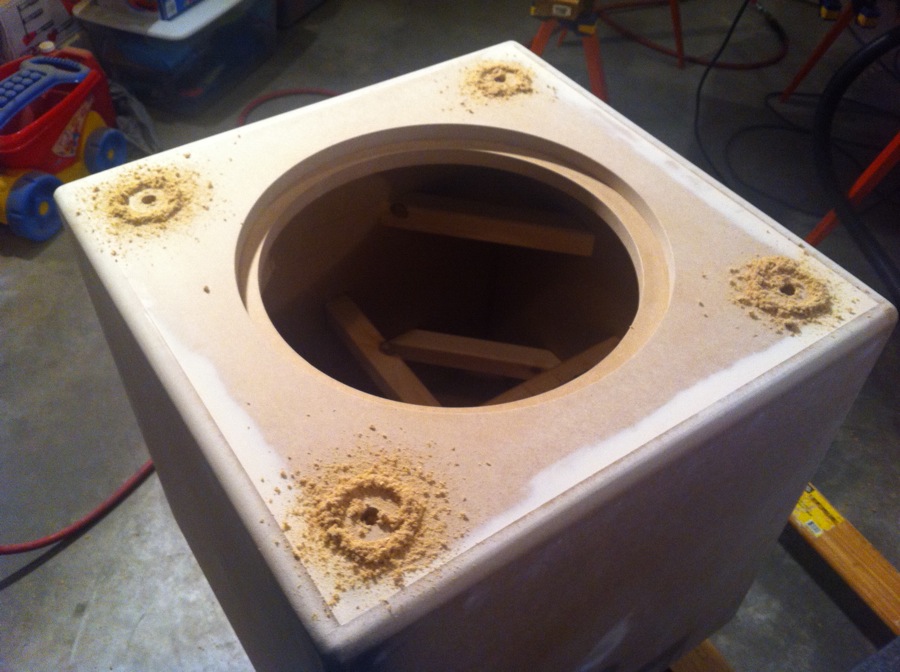
High-tech depth-stop
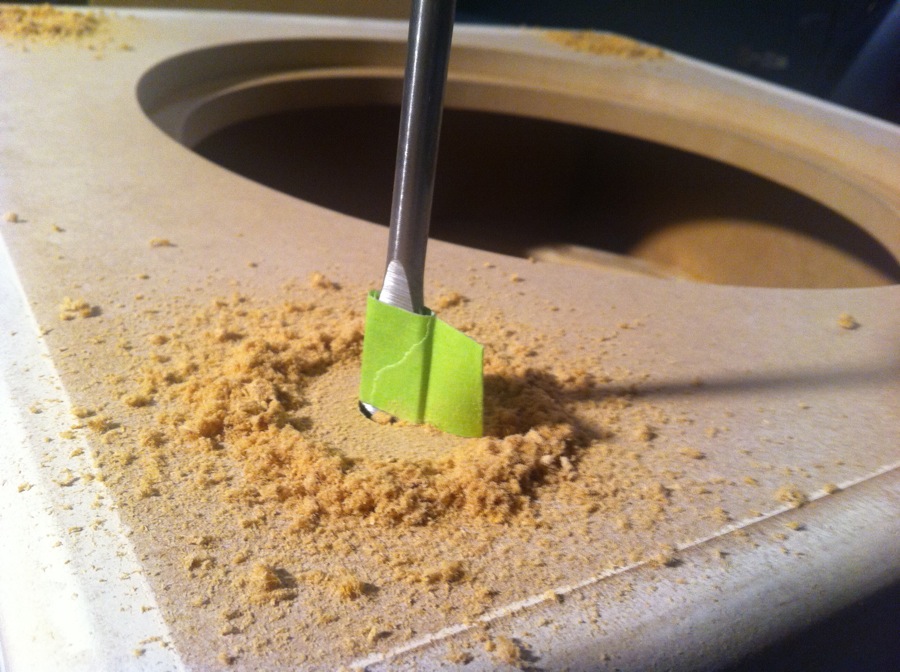
Finished hole in the baffle

SC
|
|
| Back to top |
|
|
|
|
|
|
|
You cannot post new topics in this forum
You cannot reply to topics in this forum
You cannot edit your posts in this forum
You cannot delete your posts in this forum
You cannot vote in polls in this forum
You cannot attach files in this forum
You can download files in this forum
|
Forum powered by phpBB © phpBB Group
|
|