| Author |
Message |
JorisS
Joined: 18 Jun 2007
Posts: 160
Location: Uppsala, Sweden
|
| Posted: Sun Mar 08, 2009 8:01 pm Post subject: |
|
|
Thanks a lot for all the help so far! Much appreciated. I'll printout the pdf and read it often and then some, as you suggest 
It is offcourse much more giving and easier to be at the spot and operating the controls, but unless you have any holiday to Sweden planned in the near future I guess we'll have to make do with my poor attempts at explaining things, plus pictures.
As for red being out of focus... I don't know to be honest, I think it's fairly good but then capturing it on camera adds a lot of extra blurriness.
Off to see a TV episode now, then it's bedtime.
As said I'll read through the procedure and hopefully can continue during this week.
Cheers,
Joris
|
|
| Back to top |
|
 |
JorisS
Joined: 18 Jun 2007
Posts: 160
Location: Uppsala, Sweden
|
| Posted: Mon Mar 09, 2009 9:48 pm Post subject: |
|
|
Wow have printed and read that manual, it indeed isn't easy to understand
One problem I have is that I should get glasses, have done tests and am rated at about -0.75 for both eyes - I can see fairly well but I can't really see focus and such clearly enough when I'm operating the projector at a couple of meters distance. So I think I'll get that sorted first, then dive deeper into this adventure 
|
|
| Back to top |
|
|
Satanier
Joined: 25 Aug 2008
Posts: 185
|
| Posted: Tue Mar 10, 2009 5:55 pm Post subject: |
|
|
|
Let us know how it works out, I was never able to solve my green tube focus problem on my XG-75
|
|
| Back to top |
|
|
JorisS
Joined: 18 Jun 2007
Posts: 160
Location: Uppsala, Sweden
|
| Posted: Tue Mar 10, 2009 6:48 pm Post subject: |
|
|
You had similar problems? Well I do think it improved with the tips in the topic so far - unfortunately I had to move the PJ out of the way again now, we'll be moving next month and I want to wait till it's in a more permanent position. And for my glasses to arrive 
|
|
| Back to top |
|
|
jarseneau

Joined: 06 Nov 2007
Posts: 323
Location: WI
|
| Posted: Tue Mar 10, 2009 10:01 pm Post subject: |
|
|
The manual is challenging and it doesn't describe well how to move the rings to make the adjustment. Maybe this explanation will help:
Each Pole (called 2, 4, and 6) is comprised of a pair of rings and provide 2 key elements; STRENGTH and DIRECTION.
For a particular ring pair or pole, the STRENGTH is determined by the offset you make between the adjustment tabs. You null or 0 the STRENGTH by putting the tabs in an overlap position, as you spread them apart, the STRENGTH grows.
The DIRECTION element is determined by the rotation of the pair of rings in the set (while keeping their tab offset constant).
It can be confusing if you move only 1 of the tabs in the ring pair because you are actually changing both STRENGTH and DIRECTION at the same time. The better method is to rotate them around the neck as a pair to determine the needed DIRECTION of correction. Then adjust STRENGTH by changing the offset between the tabs while keeping the midpoint between them constant.
_________________
Jerry
|
|
| Back to top |
|
|
JorisS
Joined: 18 Jun 2007
Posts: 160
Location: Uppsala, Sweden
|
| Posted: Tue Mar 10, 2009 10:06 pm Post subject: |
|
|
| jarseneau wrote: | The manual is challenging and it doesn't describe well how to move the rings to make the adjustment. Maybe this explanation will help:
Each Pole (called 2, 4, and 6) is comprised of a pair of rings and provide 2 key elements; STRENGTH and DIRECTION.
For a particular ring pair or pole, the STRENGTH is determined by the offset you make between the adjustment tabs. You null or 0 the STRENGTH by putting the tabs in an overlap position, as you spread them apart, the STRENGTH grows.
The DIRECTION element is determined by the rotation of the pair of rings in the set (while keeping their tab offset constant).
It can be confusing if you move only 1 of the tabs in the ring pair because you are actually changing both STRENGTH and DIRECTION at the same time. The better method is to rotate them around the neck as a pair to determine the needed DIRECTION of correction. Then adjust STRENGTH by changing the offset between the tabs while keeping the midpoint between them constant. |
Invaluable, thanks!
|
|
| Back to top |
|
|
scir16v
Joined: 02 Jan 2009
Posts: 113
Location: St. Louis
|
| Posted: Wed Mar 11, 2009 4:23 pm Post subject: |
|
|
|
That is the best layman explanation for the magnets. Thank you so much.
|
|
| Back to top |
|
|
JorisS
Joined: 18 Jun 2007
Posts: 160
Location: Uppsala, Sweden
|
| Posted: Tue Apr 06, 2010 6:02 pm Post subject: |
|
|
*UPDATE*
Hi all,
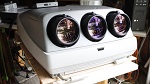
last spring we moved to our own house, we've done loads of refurbishing and replaced floors, tapestries, the entire kitchen... amongst this we got a little daughter in August, but NOW... now I've finally got the PJ up on the ceiling in it's own, semi-dedicated (it doubles as guest room lol) cinema room. I was gonna fix and add some pictures, but just realized the room looks like a hurricane passed through so I'll wait a bit with that lol
Anyway, last night I did a setup and MADE AN UTTER MESS of things, couldn't get anything straight or focused or converged :s Desperate for at least SOME image I did a lot of point adjustment, but it simply was worthless. This morning I started from scratch, also changed input signal to 1080i instead of the 1080p I was testing last night. Found a good guide for the setup I had printed out previously and started anew with mechanical setup, and now managed a satisfactory setup. One thing that I stumbled upon today and which apparently caused me a LOT of problems last night was the "LINE DISTORTION" - I honestly don't know what it's for but the "wave" was far outside the square and after putting it in the middle I A) got rid of a weird shape towards the right of the screen (bit like an S in the lower regiment of the screen and an upside down similar in the upper regiment, couldn't for the life of me sort that alignment out with the other settings!) and B) when doing the point alignment/convergence it actually affected the part where the cursor was, last night the changes occurred a far bit off to the left of it :S
Anyway, one thing I noticed now while puzzling about was again the blooming and not quite optimal focus on the green image. After a while I realized I had this problem before and luckily old topics are saved here, so I just read through the entire topic again and will make an attempt with the magnets one of these days. I never got around to do so last time due to the PJ being in a very temporary dinner table setup - now it's stuck in the ceiling where it is supposed to be and - hopefully - will remain for a long time
Just thought I'd update the thread and possible bring the discussion back to life when I start working with the magnets. The one thing that has always worried me is the high voltage inside the PJ and the fact I do not know which parts are the dangerous ones. Tips are very welcome on the subject 
Cheers
//Joris
|
|
| Back to top |
|
|
JorisS
Joined: 18 Jun 2007
Posts: 160
Location: Uppsala, Sweden
|
| Posted: Thu Jul 15, 2010 9:34 pm Post subject: |
|
|
Here's another update - I've been working with this some time back and unfortunately I've still not managed to get this sorted. Red and blue lines in the crosshair pattern are by far sharper than the green. To be honest, this in combination with the fact that the convergence of red and blue seems to slightly shift between each time I turn on the projector has almost brought me to the point where I'm going to get rid of this lump and go digital....
I know you guys don't want to let that happen so I'll give it one last good attempt starting tomorrow, with a new thread and new pictures.
Cheers
//Joris
|
|
| Back to top |
|
|
scir16v
Joined: 02 Jan 2009
Posts: 113
Location: St. Louis
|
| Posted: Fri Jul 16, 2010 3:19 am Post subject: |
|
|
I had a blooming problem with the green on my 1350. I fixed this by adjusting the green drive pot. I haven't messed with mine in awhile but I think it's on the same board as all the test points are. You may have to adjust that pot to turn the drive down a bit. That may get rid of your blooming problem.
The movement of the crosshairs may be attributed to warm up. I noticed that mine has a tendency to lose convergence slightly when it warms up. They shift.
|
|
| Back to top |
|
|
JorisS
Joined: 18 Jun 2007
Posts: 160
Location: Uppsala, Sweden
|
| Posted: Fri Jul 16, 2010 9:14 am Post subject: |
|
|
Thanks for the reply - any chance of a pic of which pot that is you're referring to?
I'm considering building a hush box for the PJ to a) lower fan noise and b) improve cooling by means of extracting hot air from above it and straight out the room, perhaps that would sort heat issues if indeed those are the reason for my convergence shifting.
Going to have a search of the forums for any tips / designs on hush box
Any tips welcome!
|
|
| Back to top |
|
|
Jeremy112
Joined: 28 Sep 2006
Posts: 2649
Location: Fond du Lac, WI
|
| Posted: Fri Jul 16, 2010 8:32 pm Post subject: |
|
|
While I don't own (Yet) an NEC XG1100, I do own a PG, and the "drive" that people speak of would be the G2 adjustments. Most of the time it is recommended that you DO NOT tamper with these, unless it is absolutely necessary...
In my case with my 9PG it was as the Blue Drive, or "G2" adjustment was cranked up considerably to the point where my blacks were almost pure blues. Once I adjusted that it made the image instantly better.
Now the only reason I had to redo my G2 adjustment was because (assuming) the previous owner/calibrator decided it needed adjusting.
If you are the first owner of your XG, then you should not need to adjust the G2 at all unless you had previously done so before.
Im willing to bet that your G2 needs adjustment, that would fix the blooming on the green tube. as for the focus, I think that would also improve, plus doing the CPC magnet adjustments to make your comets into circle's on your test pattern will do a world of good.
Good luck, and don't give up on CRT so easily, once you crack the code you wont want a digital 
_________________
When I'm asking for a Model number, that doesn't mean I'm asking for a nude photo with your number on it
|
|
| Back to top |
|
|
scir16v
Joined: 02 Jan 2009
Posts: 113
Location: St. Louis
|
| Posted: Tue Jul 20, 2010 5:58 pm Post subject: |
|
|
| JorisS wrote: | Thanks for the reply - any chance of a pic of which pot that is you're referring to?
I'm considering building a hush box for the PJ to a) lower fan noise and b) improve cooling by means of extracting hot air from above it and straight out the room, perhaps that would sort heat issues if indeed those are the reason for my convergence shifting.
Going to have a search of the forums for any tips / designs on hush box
Any tips welcome! |
It'll be a few days bfore I can get you a pic of the pot to adjust. Do you have an o-scope? It really helps to adjust anything pot on an XG with one.
|
|
| Back to top |
|
|
JorisS
Joined: 18 Jun 2007
Posts: 160
Location: Uppsala, Sweden
|
| Posted: Tue Jul 20, 2010 8:10 pm Post subject: |
|
|
No sorry  wouldn't know how to use it either without proper instructions... could perhaps borrow one though. Found the pot by the way so don't worry about that one wouldn't know how to use it either without proper instructions... could perhaps borrow one though. Found the pot by the way so don't worry about that one
|
|
| Back to top |
|
|
|
|


