| Author |
Message |
AVDG
Joined: 11 Jul 2008
Posts: 15
Location: Plymouth, MN
|
| Posted: Mon Dec 08, 2008 8:54 pm Post subject: |
|
|
I actually live in St. Bonifacius- so your actually pretty close to be. I also design home theaters for a living.
PM me if your interested in some professional advice.
Gary
|
|
| Back to top |
|
 |
stgdz
Joined: 07 Dec 2008
Posts: 107
|
| Posted: Tue Dec 09, 2008 1:46 pm Post subject: |
|
|
I fell asleep in the recliner last night reading the owners manual but I discovered some of the alignment tools last night. This thing is a tinkers dream. Turn the dial to 11 and see why it doesn't work j/k.
How accurate are the pjcalc results and how should I go about my adjustments with my white bed sheet? My projector is set about 144-150 inches away from the sheet measured from the green tube's front glass. It is currently projecting a 54x96 image and according to the PJcalc states that the distance should be 130" but if I push the bed closer the image will get smaller. I will probably go with the table route and move the projector back and forth until I can get the width to be the correct amount. I know I am stepping ahead of myself so I will most likely spend the weekend playing with the adjustments as the custom owners manual suggests.
I haven't played with the focusing rings yet either.
Reading about the cleaning of the glass I checked the glass out and it has a ton of dust on it, but there is also some built up crap on it. It appears to calicified on the lens and the plan is to make up the cleaning solution let it soak
Also the previous own mounted a wood sheet on the bottom and then put rails on the side of the wood. The rails would then slide into to slightly larger rails mounted on the ceiling. I don't dare to take it off because I figure I may break something but I think I will. Can the projector be set upside down(a ceiling mount) so that the remote would be sitting on the bed?
|
|
| Back to top |
|
|
jkruger

Joined: 24 Oct 2007
Posts: 2435
Location: Carlsbad, CA
|
| Posted: Tue Dec 09, 2008 2:18 pm Post subject: |
|
|
|
Have you taken the lenses off yet and looked at the tube faces to see what kind of wear pattern might be there? You might want to open up the rasters and then determine the correct distance for your pj.
|
|
| Back to top |
|
|
stgdz
Joined: 07 Dec 2008
Posts: 107
|
| Posted: Tue Dec 09, 2008 2:40 pm Post subject: |
|
|
| jkruger wrote: | | Have you taken the lenses off yet and looked at the tube faces to see what kind of wear pattern might be there? You might want to open up the rasters and then determine the correct distance for your pj. |
No I haven't. I am somewhat intimidated by the "eye sore" as the better half calls it. I can push the buttons all I want but I do worry that I may mess something up. Once I get over that though I did read int he manual though that I can install google flappers but I am not certain if this is necessary.
|
|
| Back to top |
|
|
jkruger
Joined: 24 Oct 2007
Posts: 2435
Location: Carlsbad, CA
|
| Posted: Tue Dec 09, 2008 2:46 pm Post subject: |
|
|
|
Eye sore? She calls it an eyesore? Oh... she needs a swift kick in the ....
|
|
| Back to top |
|
|
AnalogRocks
Forum Moderator
Joined: 08 Mar 2006
Posts: 26706
Location: Toronto, Ontario, Canada
TV/Projector: Sony 1252Q, AMPRO 4000G
|
| Posted: Tue Dec 09, 2008 3:08 pm Post subject: |
|
|
| stgdz wrote: | I fell asleep in the recliner last night reading the owners manual but I discovered some of the alignment tools last night. This thing is a tinkers dream. Turn the dial to 11 and see why it doesn't work j/k.
How accurate are the pjcalc results and how should I go about my adjustments with my white bed sheet? My projector is set about 144-150 inches away from the sheet measured from the green tube's front glass. It is currently projecting a 54x96 image and according to the PJcalc states that the distance should be 130" but if I push the bed closer the image will get smaller. I will probably go with the table route and move the projector back and forth until I can get the width to be the correct amount. I know I am stepping ahead of myself so I will most likely spend the weekend playing with the adjustments as the custom owners manual suggests.
I haven't played with the focusing rings yet either.
Reading about the cleaning of the glass I checked the glass out and it has a ton of dust on it, but there is also some built up crap on it. It appears to calicified on the lens and the plan is to make up the cleaning solution let it soak
Also the previous own mounted a wood sheet on the bottom and then put rails on the side of the wood. The rails would then slide into to slightly larger rails mounted on the ceiling. I don't dare to take it off because I figure I may break something but I think I will. Can the projector be set upside down(a ceiling mount) so that the remote would be sitting on the bed? |
DON'T soak the lenses in the solution. They are not sealed and you'll end up with cleaning solution on the inside of the lens. Then you have to take them all apart. It's a PITA, and no I didn't learn that on the hard way 
I hope there's a hole for the fans to draw air through, or at least a gap to the bottom of the projector. Otherwise it's not getting the proper cooling. Look in the manual it'll show you were the belly fans are. You want those to breath.
_________________
Tech support for nothing
CRT.
HD done right!
|
|
| Back to top |
|
|
stgdz
Joined: 07 Dec 2008
Posts: 107
|
| Posted: Tue Dec 09, 2008 3:18 pm Post subject: |
|
|
| AnalogRocks wrote: |
DON'T soak the lenses in the solution. They are not sealed and you'll end up with cleaning solution on the inside of the lens. Then you have to take them all apart. It's a PITA, and no I didn't learn that on the hard way . |
So how do I clean off the calcified substance? From what I understand I want to be very careful cleaning the lenses.
| AnalogRocks wrote: |
I hope there's a hole for the fans to draw air through, or at least a gap to the bottom of the projector. Otherwise it's not getting the proper cooling. Look in the manual it'll show you were the belly fans are. You want those to breath. |
The board extends beyond the grable handles by about 8 inches, I plan on removing the board but I don't know if the top of the chasis can handle the load like the bottom can.
I wanted to note earlier that it sounds quite loud. Its about as loud as my gaming PC, that is probably around 40db.
|
|
| Back to top |
|
|
AnalogRocks
Forum Moderator
Joined: 08 Mar 2006
Posts: 26706
Location: Toronto, Ontario, Canada
TV/Projector: Sony 1252Q, AMPRO 4000G
|
| Posted: Tue Dec 09, 2008 3:25 pm Post subject: |
|
|
| stgdz wrote: | | AnalogRocks wrote: |
DON'T soak the lenses in the solution. They are not sealed and you'll end up with cleaning solution on the inside of the lens. Then you have to take them all apart. It's a PITA, and no I didn't learn that on the hard way . |
So how do I clean off the calcified substance? From what I understand I want to be very careful cleaning the lenses. |
You apply the cleaning solution in a small area and don't let it get to the edges of the lens. That's where it seeps in and the solution ends up becomming a problem ( Oh I am punny today )
| stgdz wrote: |
| AnalogRocks wrote: |
I hope there's a hole for the fans to draw air through, or at least a gap to the bottom of the projector. Otherwise it's not getting the proper cooling. Look in the manual it'll show you were the belly fans are. You want those to breath. |
The board extends beyond the grable handles by about 8 inches, I plan on removing the board but I don't know if the top of the chasis can handle the load like the bottom can. |
Lay it on it's top on a matress or some couch cushions. Just don't put too much presure on it.
| stgdz wrote: |
I wanted to note earlier that it sounds quite loud. Its about as loud as my gaming PC, that is probably around 40db. |
Yes they can be quite loud, I got use to mine.
_________________
Tech support for nothing
CRT.
HD done right!
|
|
| Back to top |
|
|
stgdz
Joined: 07 Dec 2008
Posts: 107
|
| Posted: Tue Dec 09, 2008 3:40 pm Post subject: |
|
|
| AnalogRocks wrote: |
You apply the cleaning solution in a small area and don't let it get to the edges of the lens. That's where it seeps in and the solution ends up becomming a problem ( Oh I am punny today ) |
So if we were carrying it out and say some snow flakes got on the lenses and melted and the water ran to the side of the lens it would be bad.
I dare to ask how do you clean the lens out.
|
|
| Back to top |
|
|
AnalogRocks
Forum Moderator
Joined: 08 Mar 2006
Posts: 26706
Location: Toronto, Ontario, Canada
TV/Projector: Sony 1252Q, AMPRO 4000G
|
| Posted: Tue Dec 09, 2008 4:40 pm Post subject: |
|
|
| stgdz wrote: | | AnalogRocks wrote: |
You apply the cleaning solution in a small area and don't let it get to the edges of the lens. That's where it seeps in and the solution ends up becomming a problem ( Oh I am punny today ) |
So if we were carrying it out and say some snow flakes got on the lenses and melted and the water ran to the side of the lens it would be bad.
I dare to ask how do you clean the lens out. |
If it's on the front lens element it's not as bad, especially off to the side you won't see it up on the screen. If you got it on the rear lens element you'll see it on the screen for sure.
To clean the lenses out you take them apart, keeping in mind what goes where and shich way the glass elements face. It's not a lot of fun.
_________________
Tech support for nothing
CRT.
HD done right!
|
|
| Back to top |
|
|
jkruger
Joined: 24 Oct 2007
Posts: 2435
Location: Carlsbad, CA
|
| Posted: Tue Dec 09, 2008 5:27 pm Post subject: |
|
|
|
I have extra lenses if you need them. What are the numbers on yours?
|
|
| Back to top |
|
|
stgdz
Joined: 07 Dec 2008
Posts: 107
|
| Posted: Sat Dec 13, 2008 5:07 am Post subject: |
|
|
I think the lenses are ok, but they do need to be blown off.
I got a bit daring today though. Now that I have the stuff off I have noticed there is a lot of built up dust in there. I figure I could use compressed air to blow most of it out and have a vaccum on the otherside to remove a lot of it.
Now that I have it apart what should I do besides clean up the lenses? I kinda would like to do everything that I need to do to it before hoisting it up

That reminds me also, in the un-oficial manual it states that I should tape a cross hair over each tube. What is this for? Is it so I can align the guns to maximize the phosphor?
There really isn't any tube wear that I can see.

|
|
| Back to top |
|
|
AnalogRocks
Forum Moderator
Joined: 08 Mar 2006
Posts: 26706
Location: Toronto, Ontario, Canada
TV/Projector: Sony 1252Q, AMPRO 4000G
|
| Posted: Sat Dec 13, 2008 6:55 am Post subject: |
|
|
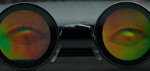
There is a little wear on that tube. Looks like it was setup too far back or on too small of a screen.
However that being said you may not notice a thing once you have it all set up.
See the yellow area in the adjusted picture below:
| Description: |
|
| Filesize: |
62.46 KB |
| Viewed: |
6772 Time(s) |
|
_________________
Tech support for nothing
CRT.
HD done right!
|
|
| Back to top |
|
|
AnalogRocks
Forum Moderator
Joined: 08 Mar 2006
Posts: 26706
Location: Toronto, Ontario, Canada
TV/Projector: Sony 1252Q, AMPRO 4000G
|
| Posted: Sat Dec 13, 2008 6:58 am Post subject: |
|
|
By the way. Dont clean you lenses with windex or paper towels. See this link for lens cleaning instructions
http://www.curtpalme.com/Lens_Cleaning.shtm
_________________
Tech support for nothing
CRT.
HD done right!
|
|
| Back to top |
|
|
stgdz
Joined: 07 Dec 2008
Posts: 107
|
| Posted: Sat Dec 13, 2008 5:39 pm Post subject: |
|
|
yeah I saw that on when I was digging around for information on what to do.
AR, what level would your rate the tubes at?
http://www.curtpalme.com/TubeCondition_RatingChart.shtm
Also if the way I understand it with all these adjustsments is that I first set the tubes relative to the phosphor with the lenses removed using the remote pad using the grid patern.
Once I have correctly setup the phosphor so that I have about a 1/4" from the edge.
Once that is setup I will put the newly cleaned lenses back on and then set my distance.
After the lenses are on and I have my correct distance set and I can start focusing.
All this is done with out a input plugged in and the brightness and contrast set very low.
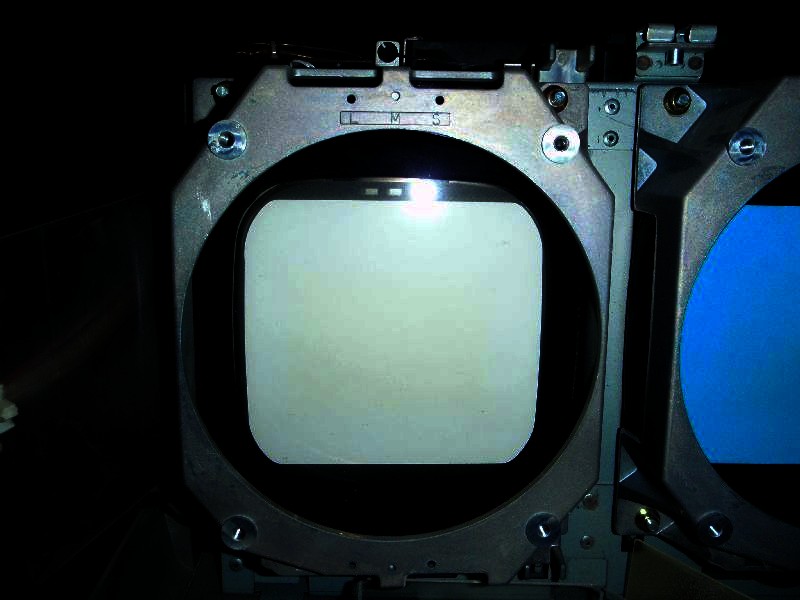
This my current test pattern without any ajdustments

edit-I have been playing around with it bit today and I noticed that in order to adjust the RGB size I had to have it hooked up to a source. I would like to reduce the unused phosphor but its like it is stuck at a certain size. I have a vertical line and a horizontal line, left and to the top respectively that I can't go beyond as the image starts to disappear. Moving the test pattern around also disappears beyond those lines. The horizontal line is shown above.
edit2-I have fully opened the case now and I am stuck

I have what appears to be a box that I can't create a image larger then on the raster
Here are the three panels

This is about as large as I can go

If I go larger stuff starts to disappear, notice the bottom is now gone

And this is about the maximum grid size that i can go to.

But like I said its basically a square that I can go no larger then. I have tried a lot of the settings and I haven't figured out how to expand the box. Its probably something simple but looking through the curt palme guide on rasters these are not configured correctly and I am unable to figure out how to configure them correctly.
Last edited by stgdz on Wed Jan 28, 2009 5:12 pm; edited 1 time in total
|
|
| Back to top |
|
|
stgdz
Joined: 07 Dec 2008
Posts: 107
|
| Posted: Fri Dec 19, 2008 4:33 am Post subject: |
|
|
Well looks like it crapped out on me 
I went down stairs to turn it on and let it warm up for 20 minutes. Went back up stairs and did somethins till then. Came back down and there is nothing present on the guns. Tried switching videos are around and everything switched it on and off a couple of times to no avail.
Can't view any of the tests or menus at all.
I don't hear the sparkle sound any more from the guns when it is turned on. Hopefully it will magically work tomorrow.
|
|
| Back to top |
|
|
AnalogRocks
Forum Moderator
Joined: 08 Mar 2006
Posts: 26706
Location: Toronto, Ontario, Canada
TV/Projector: Sony 1252Q, AMPRO 4000G
|
| Posted: Fri Dec 19, 2008 6:23 am Post subject: |
|
|
Uhhh ohhh. 
My 1252 just started acting funny. It has 14 000 hours on it and hasn't been run recently though so I'm not surprised.
Let us know what happens. Curt has every spare part you could need.
_________________
Tech support for nothing
CRT.
HD done right!
|
|
| Back to top |
|
|
stgdz
Joined: 07 Dec 2008
Posts: 107
|
| Posted: Fri Dec 19, 2008 12:47 pm Post subject: |
|
|
| AnalogRocks wrote: | Uhhh ohhh.
My 1252 just started acting funny. It has 14 000 hours on it and hasn't been run recently though so I'm not surprised.
Let us know what happens. Curt has every spare part you could need. |
really I have no idea where to start with this. There are no error codes on the side LED and the only thing that I can think of is that I didn't push the HV block cable completely against the power board, it was raised by about a 1/8 of a inch. I doubt it was that but it is still frustrating.
The last thing I did was start working on the astig magnets.
edit-ok well now it works, sorta. It didn't start up the first time and the guns didn't sparkle. I turned it off and pushed in the HV block connections and then turned it on again. It seems to work now but I don't want to turn it off as it is somewhat stable now.
|
|
| Back to top |
|
|
AnalogRocks
Forum Moderator
Joined: 08 Mar 2006
Posts: 26706
Location: Toronto, Ontario, Canada
TV/Projector: Sony 1252Q, AMPRO 4000G
|
| Posted: Fri Dec 19, 2008 4:23 pm Post subject: |
|
|
Good you figured it out.
_________________
Tech support for nothing
CRT.
HD done right!
|
|
| Back to top |
|
|
stgdz
Joined: 07 Dec 2008
Posts: 107
|
| Posted: Mon Jan 12, 2009 3:49 pm Post subject: |
|
|
How do CRT projectors deal with different aspect ratios?
Say I set my projector up for a 16x9(54"x96") screen and I want to play 4x3 material, how does the projector display the 4x3 material? Does it display it as
1)54"x96"
2)54"x72"
3)displays the 4x3 material at 54"x72" and stretch it, so I don't have black bars on the sides of the screen.
4)74"x96"
I am using a HTPC to project my images at a native resolution of 1280x720 and I seem to remember that CRT's don't have a memory for second resolutions.
|
|
| Back to top |
|
|
|
|


