7 Removal of the tube:
7.a There is a layer of silicone on the tube face that is still mounting the
tube in the housing. (Picture 7.a) This layer of silicone is not easily
accessible for removal, so instead – we shall use prying force to work the
silicone loose and then remove the tube.
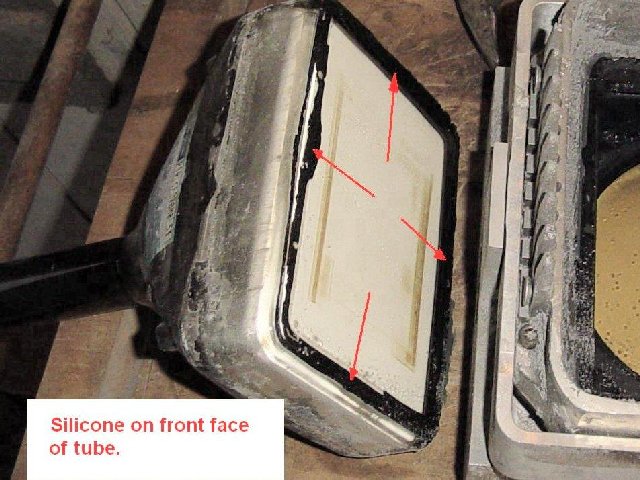
Picture 7.a.
7.b For this step we need 1) a metal wedge and 2) a hammer for tapping the
wedge in place. I used the nail claw on my hammer as a convenient wedge.
(Picture 7.b)
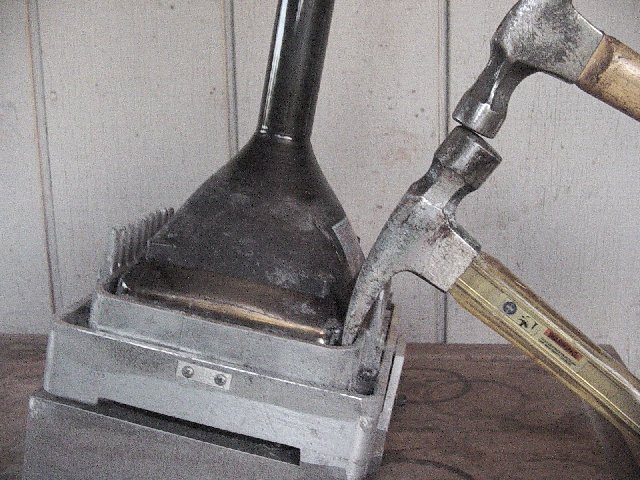
Picture 7.b.
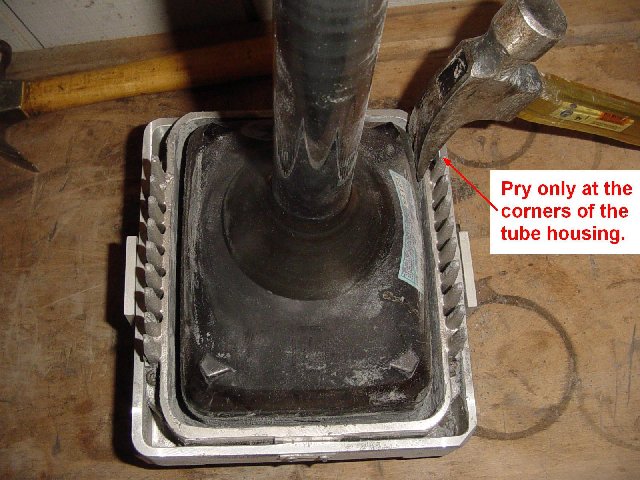
7.c Place the wedge at the corner of the housing assembly and the tube. I
strongly recommend you apply the wedge at the corner of the tube/assembly as
it’s much stronger at the corner. (Picture 7.c)
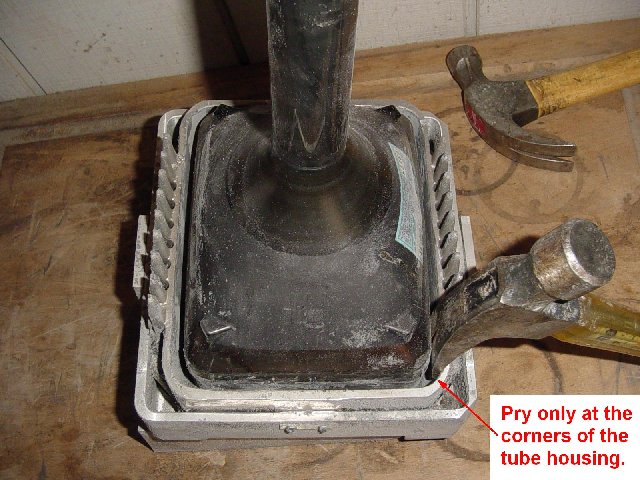
Picture 7.c.
7.d Firmly tap the wedge between the tube and housing. Use only moderate
tapping force - do not HAMMER the wedge in (we do not want to damage the housing
or tube). (Picture 7.d) It may be helpful to occasionally pry the wedge back and
forth to help loosen the tube.
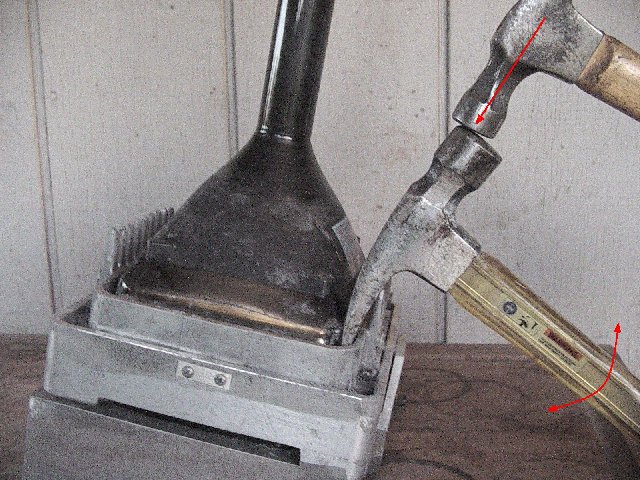
Picture 7.d.
7.e You will be finished at each corner when the tube has been forced up to
the housing on the opposite corner. (Note: Tube has no clearance left between
the tube and housing – opposite the wedge.) (Picture 7.e)
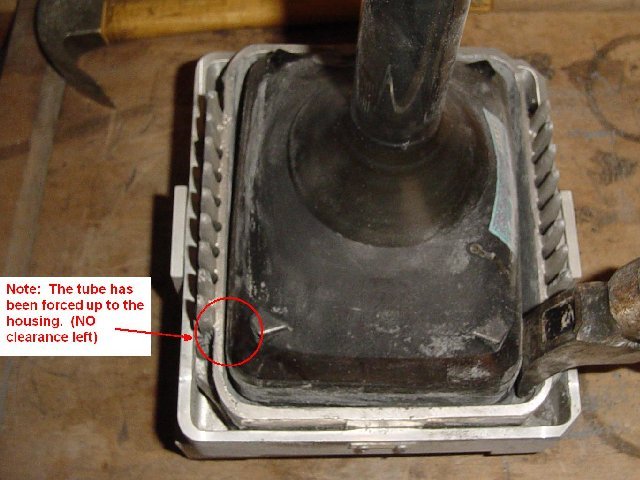
Picture 7.e.
7.f Remove wedge, and repeat at next corner. (Picture 7.f.1) (Picture 7.f.2)
Picture 7.f.1.
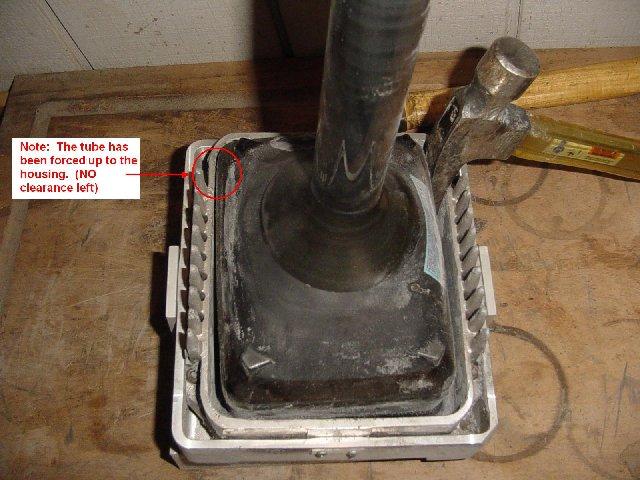
Picture 7.f.2.
7.g After wedging both corners, the tube is ready for removal. (Picture 7.g)
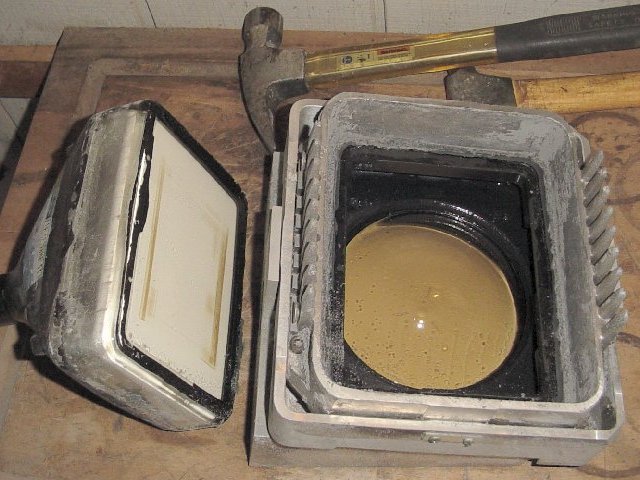
Picture 7.g.
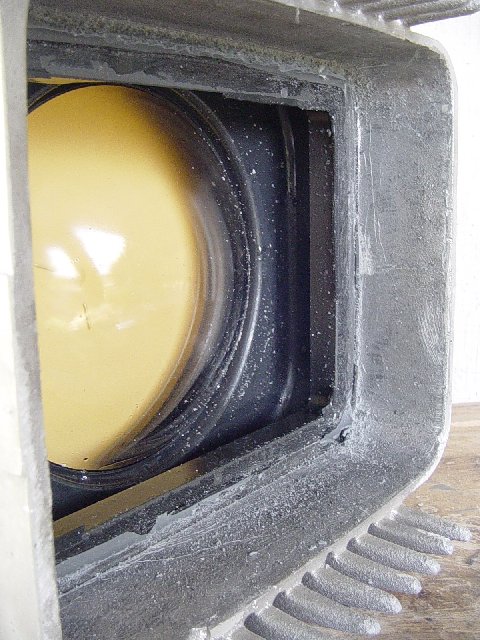
8 Cleaning the tube housing from remaining silicone and dirt:
8.a Most likely, during the tube removal process – there was some dirt/silicone
that got into the glycol chamber. (Picture 8.a) Don’t worry about it; we will
thoroughly clean the remaining silicone later.
Picture 8.a.
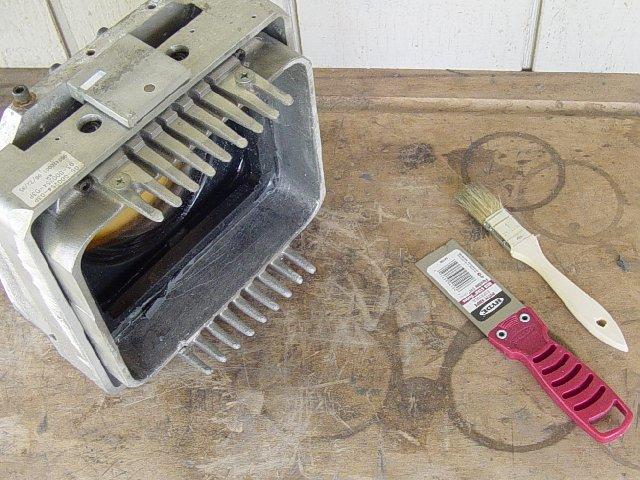
8.b For cleaning the remaining silicone, you will need: 1) a 1.5” flexible
putty knife, and 2) a clean paint brush (soft bristle). (Picture 8.b)
***DO NOT USE A FLAT SCREWDRIVER!!!!*** If you use a screwdriver, you may easily
slip and either gouge the C-element ($$$) or puncture the bellows ($$). A putty
knife will be a lot easier to control, and will be less likely for an accident.
Picture 8.b.

|

